
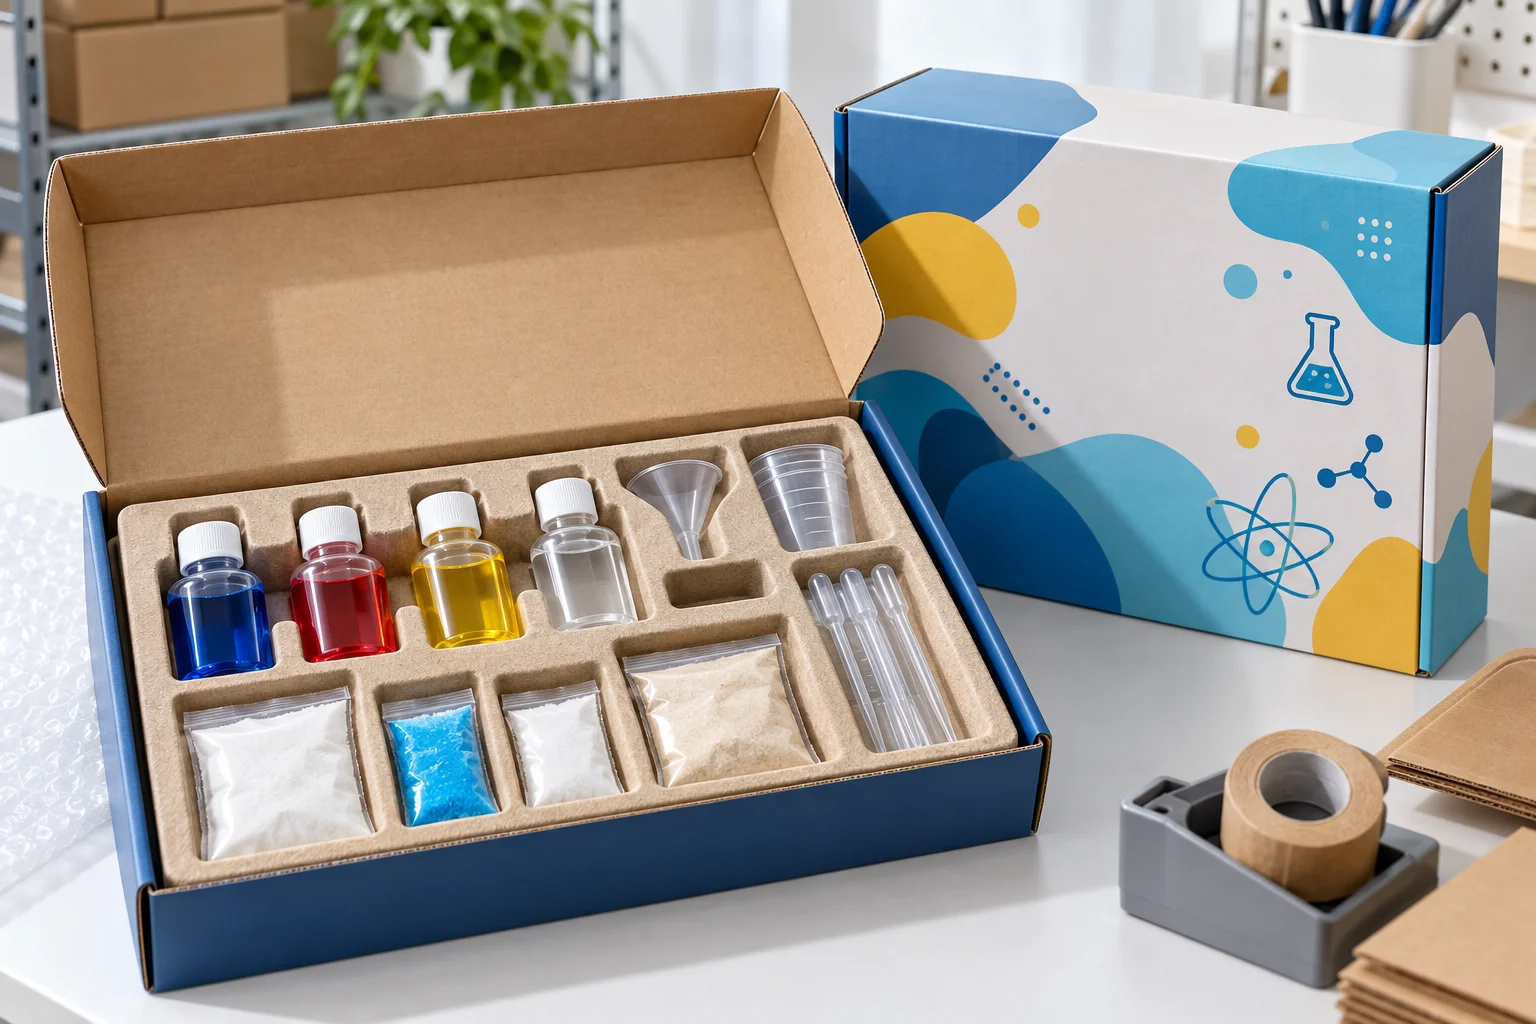
For liquids, I would use a bottle that matches the formula, a closure or inner seal that is applied the same way every time, and secondary containment if one leak could ruin the rest of the kit. The bottle should also sit firmly in the insert instead of rattling around in the box.
For powders, I would use a sealed, sift-resistant sachet or container. The pack needs to stay closed, resist punctures, and keep fine particles from working their way out during shipping.
For internal QC, I keep the target simple: 0 visible liquid leaks, 0 open or leaking powder packs, and 0 chemical containers moving freely inside the finished kit.
If any ingredient is regulated as hazardous for transport, I would stop there and check the applicable dangerous-goods rules before approving the packaging.
Use More Than One Layer of Protection
For a small non-hazardous liquid, the basic structure is usually:
liquid → compatible bottle → controlled closure or seal → secondary containment where needed → fixed insert → retail box → shipping carton
For powder:
powder → sift-resistant sealed sachet or container → secondary containment where needed → protected compartment → retail box → shipping carton
A kit with three liquid bottles and four powder sachets already has seven filled packs that can go wrong. Each one needs a defined material, closure, position, and inspection method.
When we work on a custom science kit, I would want the bottle, cap, sachet, fill quantity, insert, and packing sequence decided before mass production starts.
Regulatory note: The PHMSA and USPS rules cited below only apply when a shipment falls into the relevant regulated category. I use them here to explain sound packaging principles, not as a blanket rule for every science kit.
Check the Material Before You Pick the Package
Before choosing a bottle or pouch, I would confirm:
- the exact formulation;
- the quantity in each container;
- whether it is a liquid, gel, fine powder, or granular solid;
- whether moisture is a concern;
- whether the material is compatible with the container;
- the expected storage period;
- the target age group;
- the destination market;
- the transport classification.
A Safety Data Sheet can help with hazards, composition, handling, storage, and physical properties. OSHA sets out the required SDS structure and content.[1]
One detail matters here: OSHA does not enforce the information requirements in SDS Sections 12–15, and Section 14 covers transport information. So I would use the SDS as one input, not as the only basis for transport classification.
Two bottles can hold the same amount and still need very different packaging. A non-hazardous coloring solution is not the same packaging problem as a regulated corrosive or flammable liquid.
How Should Liquids Be Packed?
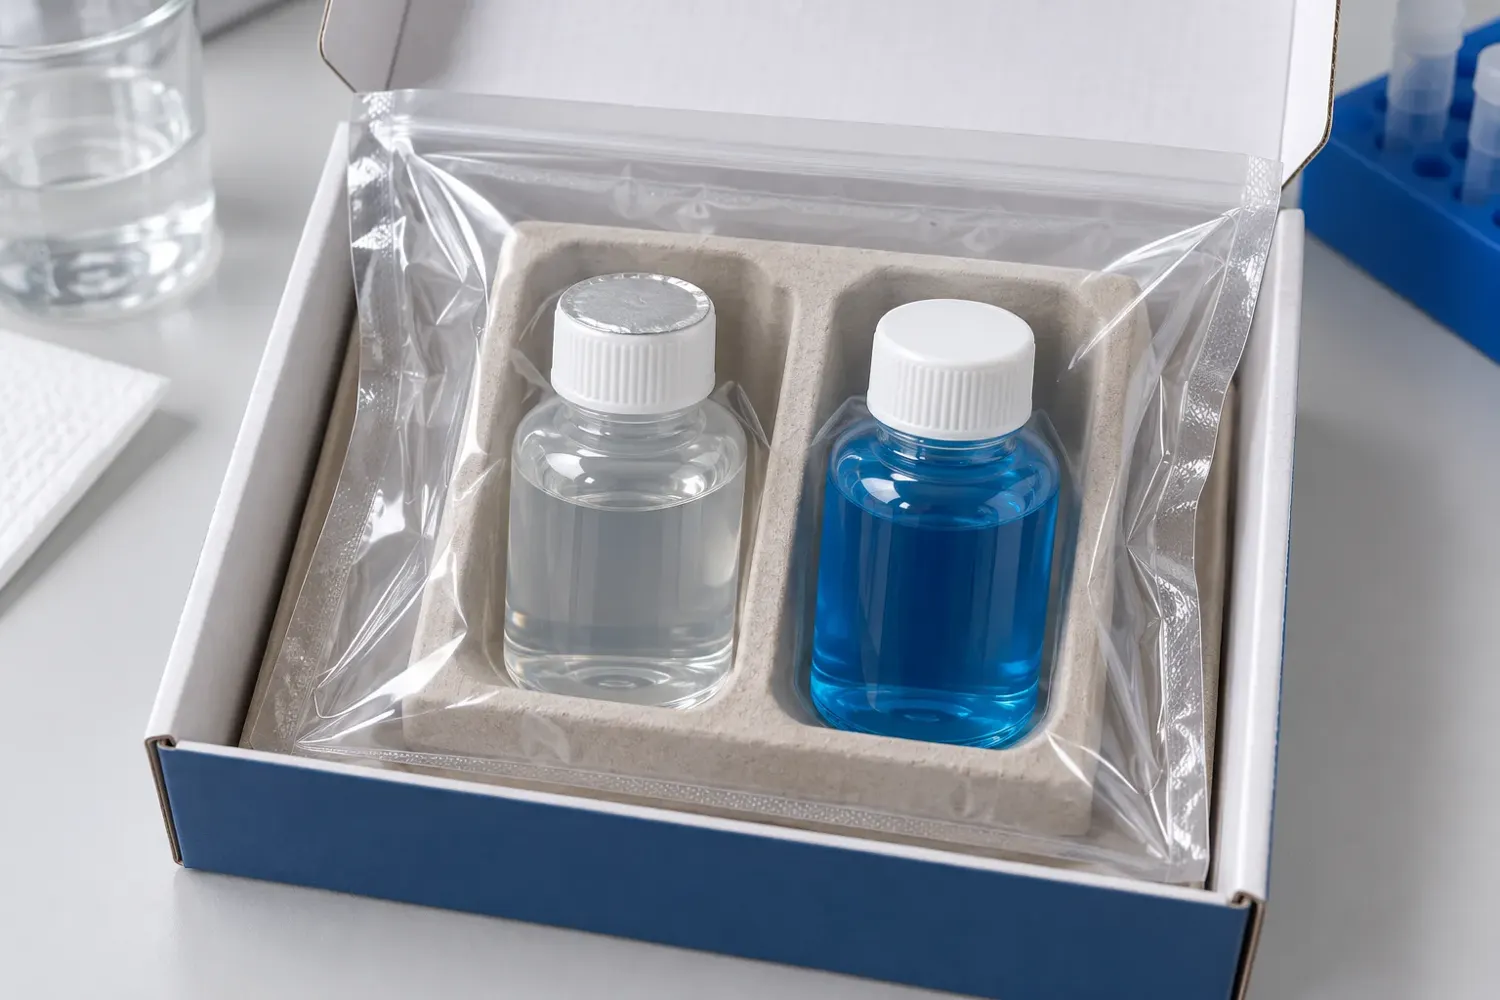
For liquids, I focus on four things:
- container compatibility;
- closure consistency;
- secondary containment;
- movement inside the kit.
Test the Real Formula in the Real Bottle
HDPE, LDPE, PET, PP, glass, and other packaging materials do not behave the same way with every liquid.
I would test the actual formula in the production bottle. Water is only useful if it genuinely represents the product.
Then I would check for:
- softening;
- swelling;
- cracking;
- bottle distortion;
- cap-liner damage;
- discoloration;
- liquid around the bottle neck;
- loss of seal integrity.
Define How the Cap Is Closed
The bottle neck, thread, cap, liner, plug, and inner seal work together. One weak part can undo the rest.
Tighter is not always better. A cap that is too loose may leak. A cap that is over-tightened can damage threads, crush a liner, or distort a small plastic bottle.
I would not leave a factory instruction as “tighten firmly.” I would define the approved closing method.
Take a 500-kit order with three liquid bottles in each kit. That is 1,500 separate closures. A small inconsistency repeats very quickly at that scale.
For applicable regulated hazardous-material shipments, PHMSA requires packaging and closures to prevent identifiable release under normal transport conditions and requires closures to remain secure against loosening.[2]
Control the Fill Level and Headspace
I would not fill a bottle to the neck just because there is room.
Liquid volume and internal pressure can change with temperature and transport conditions. There is no useful rule saying every science-kit bottle should have 10% headspace.
Instead, record:
- nominal bottle capacity;
- actual brimful capacity where relevant;
- target fill volume;
- fill tolerance;
- validated headspace.
A bottle sold as “10 mL” does not automatically have exactly 10 mL of total internal capacity. Nominal fill and brimful capacity are not always the same thing.
Add Secondary Containment When One Leak Could Spread
A small leak is enough to make a mess inside a compact kit. It can wet instructions, labels, paper inserts, and powder sachets.
Where it makes sense, I would put each bottle inside a sealed leak-resistant pouch before it goes into the retail box.
USPS packaging instructions for certain regulated materials use the same basic idea: primary receptacle, secondary containment, cushioning, and absorbent material where required.[3]
Have liquids or powders in your science kit?
Send the liquid type, fill volume, powder weight, target market, order quantity, and current bottle or sachet format. K&M can review the packaging structure before the sample is locked.
Specify How Much Liquid the Absorbent Layer Can Hold
“Add an absorbent pad” is too vague for a production specification.
Say a kit contains:
- Bottle A: 10 mL;
- Bottle B: 8 mL;
- Bottle C: 5 mL.
Total liquid: 23 mL.
If those three bottles sit inside one secondary enclosure, I would assess that enclosure against the liquid volume inside it. A tiny pad means very little if nobody knows how much it can actually absorb.
For certain regulated mailing categories, USPS requires enough absorbent material to take up the full liquid contents of the applicable primary receptacle or receptacles.[4]
If absorbent material is part of the kit design, its required capacity should appear in the packaging specification.
How Should Powders Be Packed?
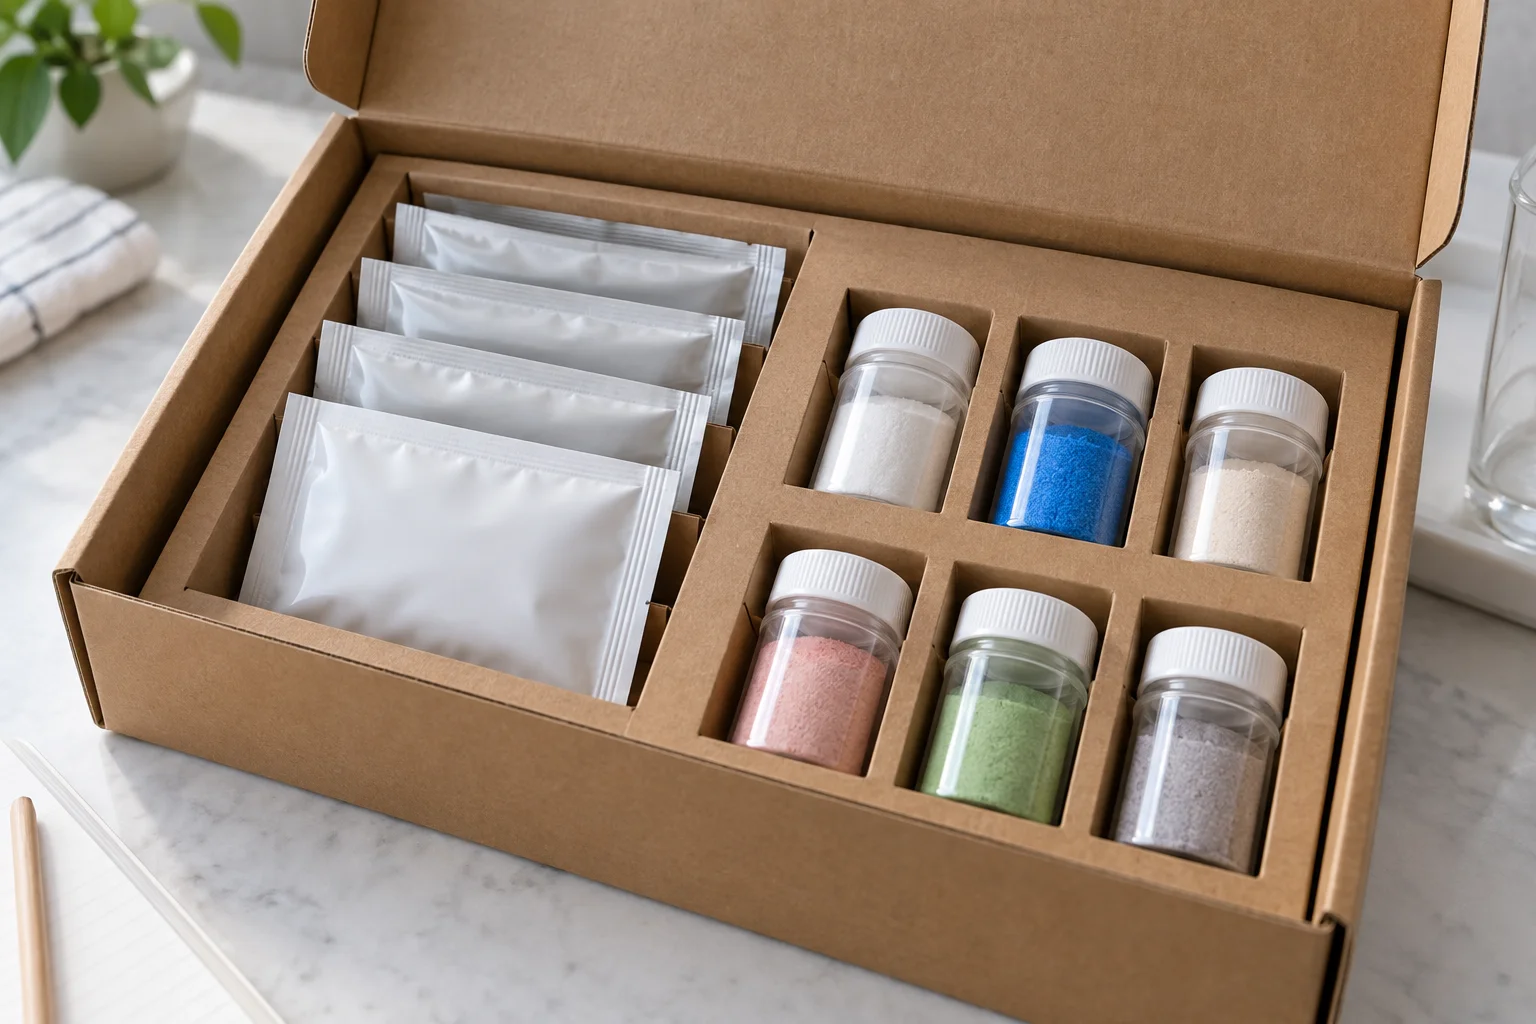
Powders fail in a different way. Fine material can work through gaps that would never look like a normal liquid leak.
I would control:
- sift resistance;
- seal integrity;
- moisture protection where needed;
- puncture and abrasion risk.
Use a Sift-Resistant Package
Depending on the powder, practical options include:
- heat-sealed laminated sachets;
- sealed PE-based pouches;
- small bottles with secure closures;
- containers with an inner plug and cap.
A loose folded bag is weak packaging for fine powder. A zip bag can also become unreliable when powder gets into the closure.
PHMSA defines sift-proof packaging as packaging that is impermeable to dry contents, including fine solid material produced during transportation.[5]
Keep Powder Out of the Seal Area
In crystal growing kits, measured powders are often packed in small sachets. A sachet can look closed and still have a weak seal if powder is trapped in the seam.
I would record:
- seal position;
- seal width;
- validated sealing settings;
- seal-area cleanliness;
- open-corner acceptance;
- visible powder-loss acceptance.
Useful internal QC targets are:
- 0 powder compromising the critical seal area;
- 0 open seams;
- 0 open corners;
- 0 visible powder escape after normal handling.
Check More Than One Sachet
I would not approve a new powder pack after looking at one or two neat samples.
For an internal pilot check, inspect 20–30 finished sachets from different points in the production run.
For 30 samples, I would want:
- 30/30 correctly filled;
- 30/30 sealed;
- 0 open seams;
- 0 visible powder leakage;
- 0 sachets with powder compromising the critical seal area.
The 20–30 range is a practical development check. It is not a regulatory sample size or an AQL requirement.
Check Moisture Risk When the Powder Is Sensitive
Some powders stay inside the sachet but still fail because moisture gets in.
If the material is moisture-sensitive, check the barrier film against the formulation and intended shelf life. I would not add desiccant by default.
Film structure, insert layout, packed size, and carton configuration should be fixed during toy packaging design, not after mass production starts.
Hold Bottles and Sachets in Place
Loose parts cause trouble. A bottle can hit another bottle. A hard plastic tool can rub against a sachet for hours. A sharp edge can eventually puncture film.
The insert should stop:
- bottle-to-bottle impact;
- heavy tools pressing on sachets;
- sharp plastic edges rubbing against packaging film;
- bottles repeatedly changing position;
- powder packets sitting under heavier parts.
Molded pulp, thermoformed trays, corrugated structures, foam, and folded paperboard can all work.
One quick check is simple: pick up the finished kit and move it gently. If the bottles keep knocking into other parts, the insert needs work.
Do Not Use the Retail Box as the Leak Barrier
A paperboard retail box should not be doing the job of the liquid or powder package.
For e-commerce shipping, I separate three jobs:
chemical package → retail science-kit package → transport carton
- the bottle, sachet, seal, and secondary containment keep the material where it belongs;
- the retail box organizes and presents the kit;
- the shipping carton protects the finished product through distribution.
How Should the Finished Package Be Tested?
A bottle test is not a kit test. A film test is not a kit test either.
I would test the final configuration with:
- the production bottle;
- the actual liquid;
- the production cap;
- the actual powder;
- the production sachet;
- the production insert;
- the retail box;
- the intended shipping carton.
The bottle material, cap model, pouch structure, fill quantity, sealing method, insert, and packout sequence should all be written into the approved toy product specification sheet.
Run a Pilot
Do not use one perfect setup sample as proof that the line is stable.
A 30-kit example with three liquid bottles and four powder sachets per kit gives:
- 90 liquid containers;
- 120 powder sachets;
- 210 filled chemical packages in total.
A useful pilot record could look like this:
| Check | Example Result |
|---|---|
| Liquid closures correctly fitted | 90/90 |
| Visible liquid leaks | 0/90 |
| Secondary liquid pouches closed | 90/90 |
| Powder sachets correctly sealed | 120/120 |
| Visible powder leakage | 0/120 |
| Incorrect chemical component count | 0/30 kits |
| Chemical packages damaged by other components | 0/30 kits |
These are example internal QC targets, not universal regulatory requirements.
Use an Inversion Check for Slow Leaks
Some bottles look dry right after filling and start leaking later.
For a simple internal check, invert filled bottles for 30–60 minutes and inspect:
- cap edge;
- bottle neck;
- liner;
- inner seal;
- bottle exterior;
- secondary pouch.
I would also turn the finished kit flat, on its side, and upside down. The package should not depend on a “THIS SIDE UP” arrow to stay dry.
Test Temperature Exposure
Heat and cold can change bottle shape, liner compression, internal pressure, adhesives, and pouch seals.
Set the test range from the real storage and shipping environment, then record:
sample count → temperature → exposure time → recovery time → leakage result
A useful report tells me what happened. “High-temperature test passed” does not.
Check Drops, Vibration, and Compression
Vibration can loosen caps and wear through sachets. Drops can knock bottles out of their cavities. Compression can push a hard component into a pouch.
Depending on the shipping route, I would test the complete package for:
- drop exposure;
- vibration;
- compression;
- temperature conditioning;
- changing orientation.
Lock the bottle, sachet, insert, and shipping configuration during the custom educational toy development process, then use that same setup for the pilot.
Already have a bottle, sachet, and box design?
Send the current BOM, fill volumes, powder weights, order quantity, and packout drawing. K&M can use them to discuss a pilot build before the bulk packaging is fixed.
Use 100% Checks for Simple Packaging Errors
Some checks are fast enough to do on every kit.
I would use 100% checks for:
- cap present;
- inner seal present where specified;
- secondary pouch present;
- powder sachet present;
- pouch visibly closed;
- correct component count;
- no visible liquid on the bottle exterior;
- no loose powder inside the retail box.
Sampling makes more sense for slower or destructive checks such as:
- fill weight or volume;
- seal-strength evaluation;
- closure performance;
- material measurements;
- destructive leak testing.
Write the Packaging Specification in Numbers
“Use a strong pouch” and “tighten the cap firmly” are not specifications.
For liquids, I would record:
- nominal bottle capacity;
- bottle material;
- target fill;
- fill tolerance;
- cap model;
- liner or inner seal;
- secondary pouch specification;
- approved closing method.
For powders:
- target net weight;
- pouch material or film structure;
- pouch dimensions;
- approved sealing method;
- critical seal acceptance criteria.
If the bottle resin, cap, liner, film structure, film thickness, pouch supplier, or insert changes, I would review the packaging again before the next bulk run.
Packaging choices also affect buying quantities. The MOQ for a private-label science kit can change with the bottle, pouch, printed packaging, and custom insert.
Control the Fill Quantity
An overfilled bottle reduces the headspace you validated. An underfilled powder sachet may change the way the experiment works.
I would not copy a universal ±2% or ±5% tolerance into every project.
Set the tolerance from:
- the formulation;
- the experiment requirements;
- the declared quantity;
- the filling equipment capability;
- applicable weights-and-measures requirements.
A simple demonstration that uses roughly one spoonful can tolerate different variation from an experiment that depends on a controlled ratio between two ingredients.
Keep Approved Samples and Records
For repeat orders, keep:
- an approved empty packaging set;
- approved filled samples;
- the current packaging BOM;
- packout photos;
- material specifications;
- the latest packaging test report.
Now scale the order up.
For 10,000 kits with three liquid bottles and four powder sachets in each kit, production includes:
- 30,000 liquid packs;
- 40,000 powder packs;
- 70,000 filled chemical packages.
If a sealing problem affected 1% of 40,000 powder sachets, that is 400 sachets to investigate or rework.
Final Pre-Shipment Packaging Check
Before shipment, I would check:
- correct bottle and sachet;
- correct fill quantity;
- correct cap or closure;
- inner seal where specified;
- dry bottle exterior;
- secondary containment present and closed;
- clean powder seal;
- no open pouch edge;
- correct component count;
- insert fitted correctly;
- no sharp or hard part pressing against chemical packaging;
- correct labels;
- clean retail carton;
- no unapproved packaging substitution.
A visible liquid leak or an open powder sachet should stop the shipment until the cause is found and the affected stock is controlled.
When sourcing wholesale science kits, I would compare the approved packaging specification and QC plan alongside the unit price.
Children’s Science Kits Need a Separate Compliance Check
For U.S. kits designed mainly for children 12 years old or younger, shipping performance is only one part of compliance. CPSC states that when a science kit is determined to be designed and primarily intended for this age group, the elements in the kit are considered children’s products and must meet applicable requirements.[6]
CPSC’s toy-safety guidance also includes ASTM F963 requirements for the cleanliness of liquids, pastes, putties, gels, and powders. ASTM F963-23 applies to relevant toys manufactured on or after April 20, 2024.[7]
Planning a science kit for retail production?
Send the target age, destination market, experiment list, liquid volumes, powder weights, packaging format, and planned quantity. These details define the sample and packaging scope before production.
FAQ
Should Every Liquid Bottle Use Secondary Containment?
No. I would use it when one leaking bottle could contaminate the rest of the kit, when the liquid or package risk justifies it, or when the applicable transport rules require it.
How Many Pilot Samples Should Be Checked?
There is no universal number for ordinary science-kit packaging. For internal development, checking 20–30 finished units from different points in the run is far more useful than approving one or two samples. Formal regulatory tests may use different quantities.
Does Passing a Leak Test Mean the Science Kit Is Compliant?
No. Leak resistance only tells you about packaging performance. Age grading, chemical requirements, toy safety, labeling, testing, certification, and destination-market rules still need their own review.
What Should Buyers Require Before Shipment?
Before shipment, I would want four clear results:
- 0 visible liquid leaks;
- 0 open or leaking powder packs;
- 0 loose chemical containers;
- 0 unapproved packaging changes.
The approved specification should list the bottle, cap, sachet, fill quantity, sealing method, secondary containment, and insert. If one of those changes, review the package again and retest the finished kit before bulk shipment.