
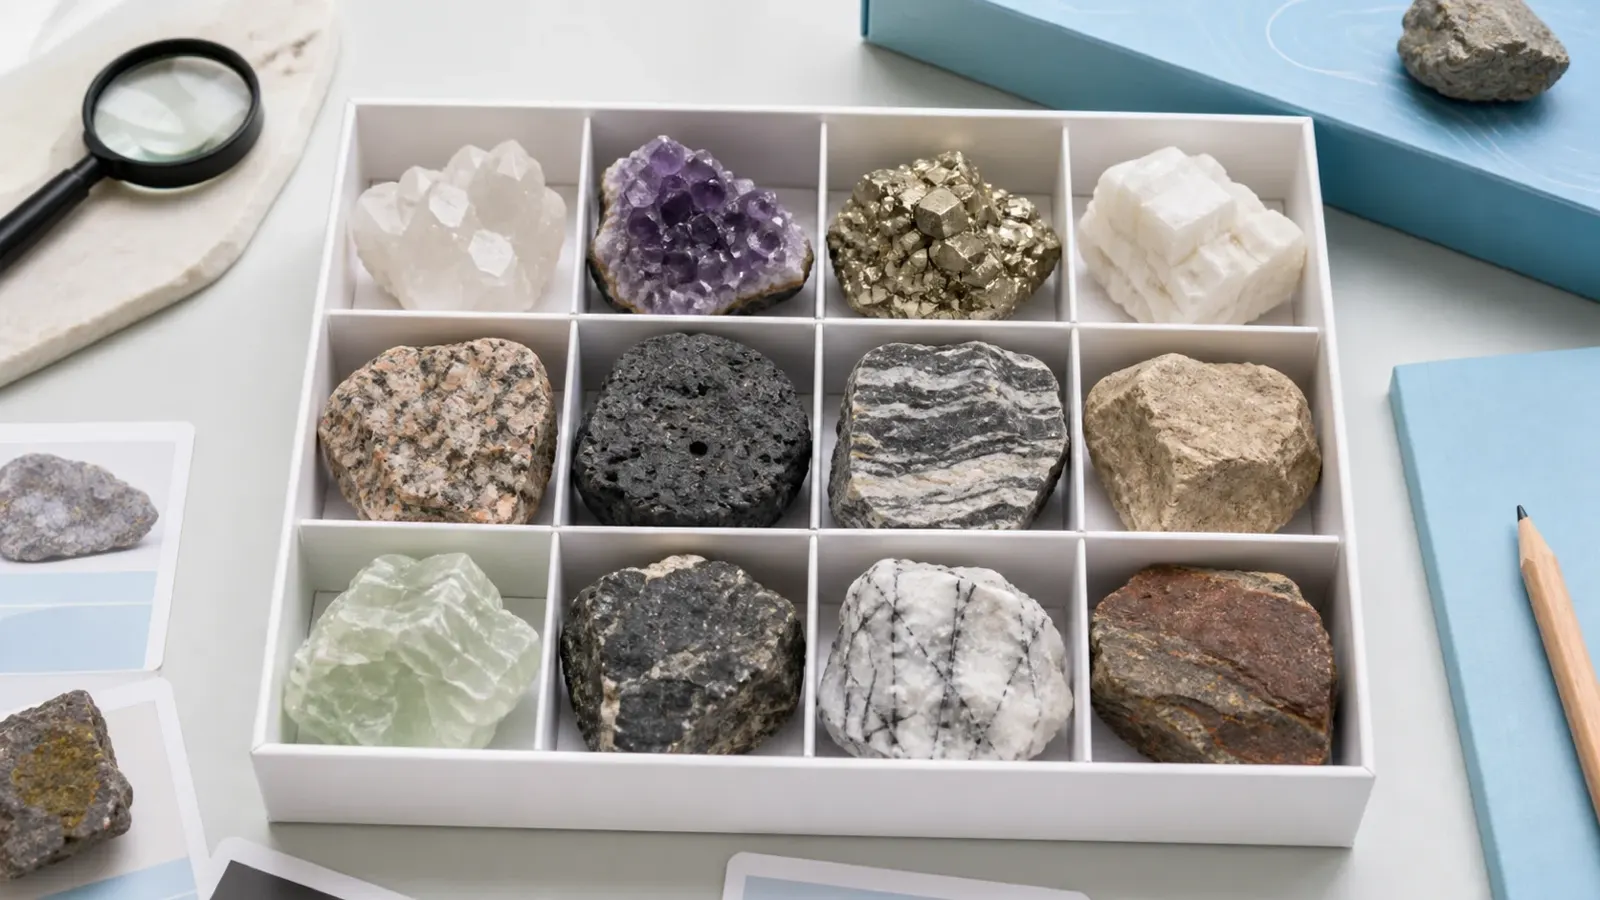
For most beginners, a good geology kit does not need a huge number of specimens. Around 20–40 well-chosen pieces is usually enough to cover the main rock groups and several useful mineral properties. For many samples, 1–2 inches (2.5–5 cm) is a practical size: large enough to examine, but still easy to store and handle.
If you only remember one thing, make it this: buy visible differences, not just more stones. A useful specimen should show something you can actually notice or test—grain size, layering, banding, cleavage, fracture, hardness, luster, streak, magnetism, pores, fossils, or crystal shape.
A mineral is a naturally occurring inorganic solid with an orderly internal structure and characteristic chemical composition. Rocks are made from one or more minerals or other geological material.[1] Quartz and calcite are minerals. Granite, basalt, limestone, and gneiss are rocks.
That sounds basic, but it matters when comparing a rock and mineral geology kit. A box advertised as “30 minerals” should not quietly count granite and basalt as minerals, and six different colors of quartz are still mostly teaching you about one mineral species.
Choose a Useful Size
The often-used 1–2 inch (2.5–5 cm) range works well for many beginner specimens, but I would not use it as a rigid rule. The better question is: can you clearly see what this specimen is supposed to show?
Some rocks need more surface area than others. Granite, for example, is much more useful when you can see several interlocking mineral grains at once. A conglomerate should be large enough to show several rounded clasts, not just one pebble. Gneiss needs enough exposed surface for the light and dark bands to make sense.
Other specimens can be quite small and still work perfectly well. A thin piece of muscovite can show sheet-like cleavage better than a large thick chunk. A 20–30 mm pyrite crystal with clear faces may teach more than a much larger dull lump.
| Size | How Useful Is It? |
|---|---|
| Under 0.5 in / 1.3 cm | Can work for small crystals or minerals with one obvious property, but often too small for rock textures |
| 0.5–1 in / 1.3–2.5 cm | Usable for many individual minerals |
| 1–2 in / 2.5–5 cm | Good general-purpose range for beginner rocks and minerals |
| Over 2 in / 5 cm | Worth paying for when extra surface reveals more grains, fossils, clasts, pores, or banding |
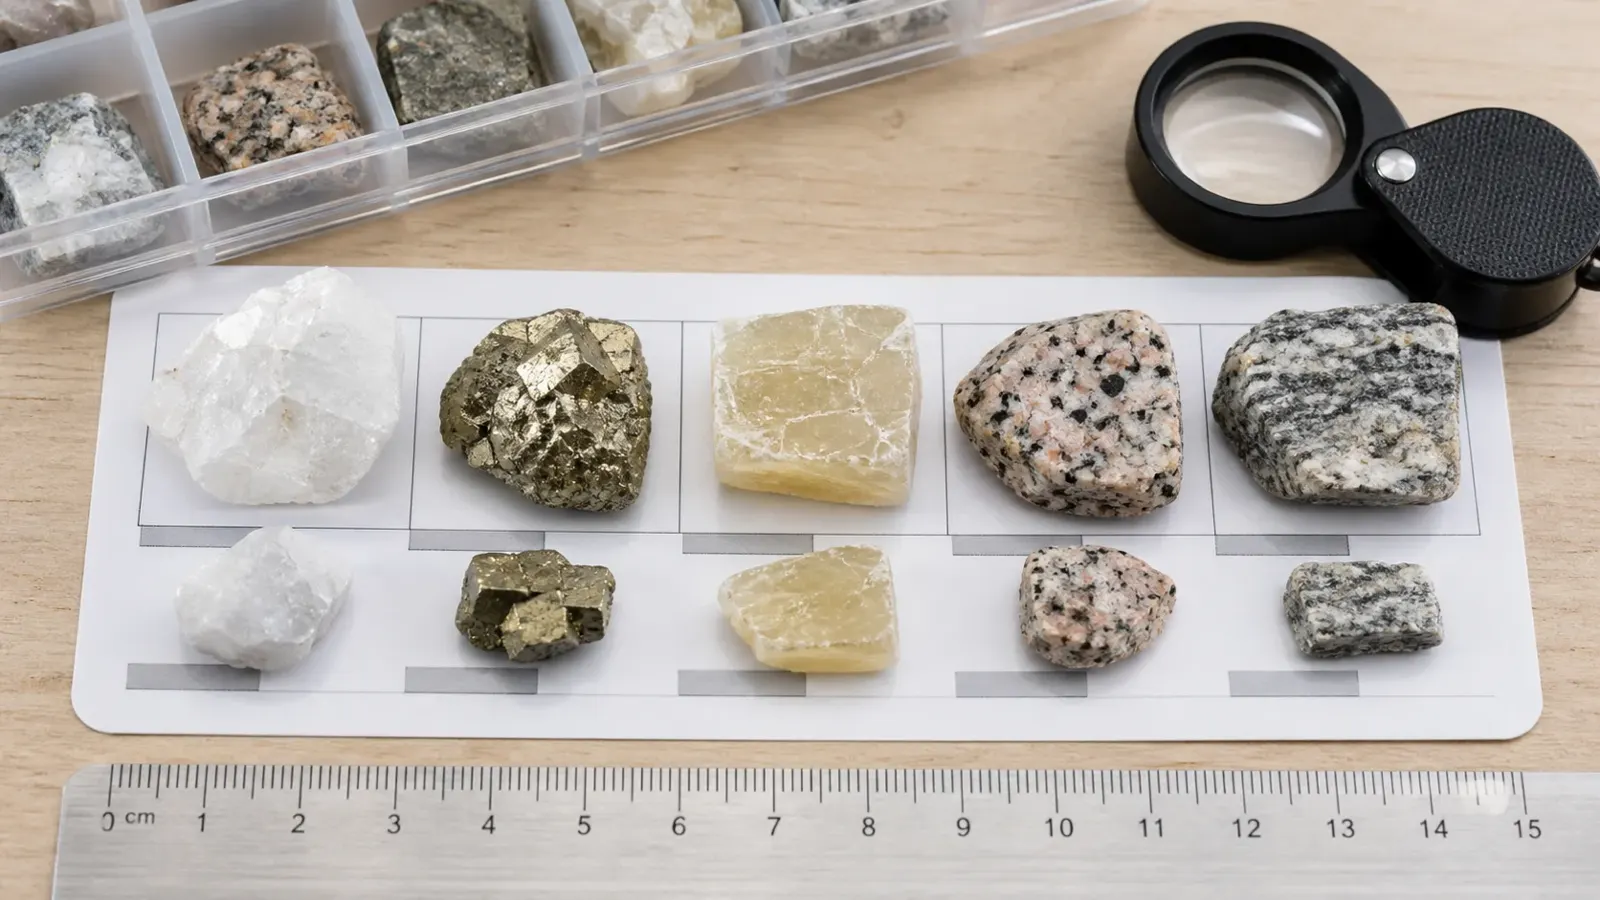
Very small pieces are not automatically bad. The problem starts when the feature disappears with the size. A tiny gneiss chip with no visible banding may be correctly identified, but it is not a particularly useful teaching specimen.
Size ranges in product listings also deserve a closer look. “0.5–2 inches” sounds generous, but it does not tell you whether most pieces are closer to 0.5 inch. A full-set photo beside a ruler tells you far more than a close-up of the three largest specimens.
For an excavation or dig kit, size also needs to fit the activity and intended age. The right size for studying a specimen is not necessarily the same thing as the right size for a children’s product.
Large specimens can be overrated too. A 4-inch quartz chunk may cost more without teaching anything that a clear 1.5-inch piece could not show. Bigger is worth it when it gives you more geological information, not simply more weight.
Count Real Variety
A 50-piece kit is not necessarily more varied than a 30-piece kit.
Imagine a 50-piece collection with 10 quartz colors, 8 similar polished agates, 7 duplicates, and 25 genuinely different rocks and minerals. You still receive 50 physical pieces, but half of the box is doing most of the educational work.
It helps to separate three numbers:
- Piece count: how many objects are in the box.
- Material variety: how many genuinely different rocks, minerals, or useful varieties are included.
- Learning variety: how many different properties, textures, tests, or geological relationships the set can demonstrate.
Quartz is a good example. Amethyst, rose quartz, smoky quartz, citrine, and rock crystal can look very different, but they are all quartz varieties. Smithsonian collections show just how many colors and forms quartz can take.[2]
That does not mean quartz varieties are useless. They are excellent in a crystal or gemstone collection. They are simply less valuable when they take up half of a general geology kit that is supposed to introduce many different materials.
As a practical rule of thumb, I would want roughly 70–80% or more of a general-purpose kit to add a different material, property, texture, comparison, or testing purpose. This is not an industry standard. It is just an easy way to spot a box padded with repeats.
Duplicates can still make sense. A classroom may need several copies of the same sample. One specimen might be used for scratch testing while another stays undamaged. Two pyrite specimens might show very different crystal forms. The question is not “Are there duplicates?” but “Why are they there?”
Balance the Three Rock Groups
A general geology kit should usually cover igneous, sedimentary, and metamorphic rocks.
USGS describes igneous rocks as rocks formed when molten material cools and solidifies.[3] Sedimentary rocks form from deposited material, including pieces of older rocks and biological or chemical material.[4] Metamorphic rocks form when existing rocks are changed by heat, pressure, fluids, or a combination of these without completely melting.[5]
For a general 30-piece kit, around 5–6 rocks from each major group is a sensible working range. You do not need an exact 5-5-5 split, but one group should not dominate the whole collection unless the kit has a specific purpose.
For igneous rocks, five simple specimens can already show a lot:
- Granite — coarse mineral grains.
- Basalt — much finer texture.
- Obsidian — glassy texture.
- Pumice — very porous and lightweight.
- Scoria — vesicular, but usually denser than pumice.
Granite and basalt are especially useful side by side. Granite commonly has crystals visible to the naked eye, while basalt usually has much smaller crystals. Cooling history plays a major role in that difference, although the two rocks commonly differ in composition as well.[6]
Sedimentary rocks work best when they show different grain sizes and materials rather than five similar gray stones.
- Shale — very fine material and thin layers.
- Sandstone — sand-sized grains.
- Conglomerate — larger rounded clasts.
- Limestone — carbonate rock, sometimes with visible fossils.
- Rock salt — a useful chemical sedimentary example.
USGS classifies clastic sedimentary rocks partly by grain size. Sand-sized particles are larger than the fine particles found in shale, while conglomerate contains gravel-sized clasts larger than 2 mm.[7]
Metamorphic rocks are easiest to understand when they are paired with something familiar:
- limestone → marble;
- quartz-rich sandstone → quartzite;
- shale → slate.
Slate should show clear splitting. Schist is much more useful when the aligned mica can actually be seen. Gneiss should show obvious banding. Marble works well next to limestone.
Quartzite is very hard because it is rich in quartz; metamorphism makes the quartz grains tightly interlock rather than somehow making quartz itself harder.[8]
Choose Minerals by Property, Not Color
A beginner mineral set does not need 20 unusual names. Around 10–12 well-chosen minerals can already cover most of the properties beginners need to compare.
A solid group might include quartz, orthoclase feldspar, calcite, gypsum, fluorite, muscovite, pyrite, hematite, magnetite, and talc.
What matters is what they let you observe:
| Mineral | Why It Is Useful |
|---|---|
| Gypsum | Very soft |
| Calcite | Low hardness and clear cleavage |
| Fluorite | Middle hardness and good cleavage |
| Orthoclase feldspar | Rock-forming mineral and hardness reference |
| Quartz | Harder and shows fracture rather than good cleavage |
| Muscovite | Splits into thin sheets |
| Pyrite | Metallic luster |
| Hematite | Useful streak |
| Magnetite | Strong magnetic response |
A 10-mineral set that clearly demonstrates 5–7 different properties can be much more useful than a 20-mineral box chosen mainly because the stones are colorful.
There is another benefit to choosing common minerals well: they connect directly with the rocks. Quartz can be seen alone, in granite, in quartz-rich sandstone, and in quartzite. Calcite can be compared with limestone and marble. Those connections make the collection feel like geology rather than a vocabulary exercise.
Use Hardness, Cleavage, Streak and Luster Together
Mineral identification gets easier when several simple properties point in the same direction.
Hardness means resistance to scratching. The Mohs scale runs from talc at 1 to diamond at 10:
- Talc
- Gypsum
- Calcite
- Fluorite
- Apatite
- Orthoclase feldspar
- Quartz
- Topaz
- Corundum
- Diamond
The scale gives an order, not equal steps. Quartz at 7 is not seven times as hard as talc.[9]
A beginner kit does not need all ten reference minerals. Gypsum 2, calcite 3, fluorite 4, orthoclase 6, and quartz 7 already give a practical spread from soft to hard.
Scratch tests can be misleading if you do not wipe the surface afterward. A softer material can leave powder that looks like a scratch. If the line disappears when wiped, you probably did not cut a groove into the harder surface.
Cleavage is the tendency to break along flat structural planes. Muscovite separates into sheets, calcite has strong cleavage in three directions, halite commonly breaks into cube-like pieces, and feldspar usually has two main cleavage directions.
Fracture is different. Quartz has no good cleavage and commonly breaks with curved, shell-like surfaces. Putting quartz beside calcite makes this much easier to understand than reading two definitions.
Luster tells you how light reflects from the surface. Pyrite looks metallic. Quartz is usually glassy. Mica may look glassy to pearly. Talc can appear pearly or greasy.
Streak is the color of mineral powder on an unglazed porcelain plate. Hematite is a classic example because its outside color can vary, while the streak is commonly reddish brown.
Magnetism gives you another kind of evidence. A clear magnetite specimen adds a test that does not depend on color at all.
You do not need every property to identify every mineral. For beginners, getting 2–3 useful observations to agree is already a much better habit than guessing from color.
Do Not Trust Color Alone
Quartz may be clear, white, purple, pink, smoky, yellow, or other colors. Smithsonian collections show amethyst, citrine, rose quartz, smoky quartz, agate, jasper, and other quartz forms.[10]
So color is useful for describing a sample, but weak for identifying it by itself.
Combine color with hardness, luster, cleavage or fracture, streak, crystal form, and magnetism where appropriate. Three useful observations usually tell you far more than three different shades of purple.
Rough, Polished or Cut?
Rough specimens are usually the most useful starting point because they keep natural textures, cleavage, fracture, grain boundaries, and crystal surfaces.
That does not mean polished material is bad. A cut or polished face can reveal things you might miss on a rough surface—banding, internal mineral patterns, fossils, agate layers, or clasts inside conglomerate.
The least useful choice for basic identification is often a box where every specimen has been heavily tumbled into a smooth pebble. It may look attractive, but many natural surfaces have been removed.
For a 30-piece general kit, I would usually rather see mostly rough or naturally broken specimens, with a few cut or polished examples where the prepared surface genuinely reveals more.
Check What “Authentic” Really Means
“Real” is too vague. Four different categories can be involved:
- Natural: formed naturally.
- Treated natural material: natural stone that has been dyed, heated, coated, polished, filled, or otherwise altered.
- Synthetic: produced artificially, sometimes with chemistry and structure close to a natural counterpart.
- Imitation or simulant: a different material made to resemble the target stone.
This distinction matters when comparing natural specimens with crystals grown in science kits. A purple laboratory-grown salt crystal is a perfectly real crystal. It is simply not natural amethyst.
Also, “natural” does not prove the label is correct. A completely natural stone can still be misidentified.
A simple check works well:
- Does the specimen have a specific geological name?
- Is it described correctly as a rock, mineral, variety, synthetic material, or treated material?
- Are treatments stated?
- Do the basic physical properties match the name?
- If it is rare or expensive, is there useful information about where it came from?
Do not expect photographs to settle difficult cases. USGS notes that rock and mineral identification often requires seeing a specimen from several angles and carrying out physical tests.[11]
Treatments Are Not Automatically Bad
Dyeing, heating, coating, polishing, cutting, filling, and stabilization all change a specimen in different ways.
The useful question is not “Has this been treated?” but “Does the treatment hide the feature I want to study?”
- Dyeing makes natural color unreliable.
- Coating can change both color and luster.
- Heating may alter color.
- Polishing can remove natural fracture and cleavage surfaces.
- Cutting can improve the view of internal structures.
- Filling or stabilization can strengthen fragile material but may alter the surface.
A dyed agate can still be real agate. A polished quartz specimen can still be real quartz. The problem is when altered appearance is presented as untouched natural appearance.
Read the Labels Carefully
A geology kit should use geological names, not just decorative names.
It should also be clear about the level of the name:
- Quartz — mineral species.
- Amethyst — quartz variety.
- Granite — rock.
- Feldspar — mineral group.
- Mica — mineral group.
- Garnet — group containing several mineral species.
More precise labels such as orthoclase feldspar or muscovite mica are better when the seller knows the identification.
A useful mineral card can stay quite short. Around 5–7 factual fields is plenty:
- name;
- formula;
- hardness;
- luster;
- cleavage or fracture;
- streak where useful;
- locality when known.
For example:
Quartz
Formula: SiO2
Hardness: 7
Luster: Vitreous
Cleavage: None
Fracture: Conchoidal
Rock cards need different information because rocks do not have one fixed chemical formula. Name, rock group, texture, main minerals, and one useful formation note are usually enough.
Locality is useful too, but it matters much more for rare or collector-quality pieces than for a basic classroom specimen. An unknown mine does not make an ordinary quartz or calcite sample fake.
Check the Product Photos
For an online purchase, I would want to see at least three useful types of photos: a full-set view, close views of specimen surfaces, and one clear scale reference.
That lets you check:
- actual size;
- typical quality, not just the best three pieces;
- rough vs. polished condition;
- chips, coatings, or weathering;
- how much natural variation to expect.
Macro photos can make a 10 mm specimen look impressive. A ruler is harder to argue with.
Natural specimens will vary in shape and color. That is normal. Receiving a completely different material, or pieces far below the stated size, is not just “natural variation.”
Keep Safety in Perspective
Most common teaching rocks and minerals can be handled normally. A small number of geological materials need more care.
National Park Service collection guidance discusses potentially hazardous specimens, including arsenic-bearing minerals and asbestos minerals.[12]
That does not mean every specimen containing a hazardous element is dangerous to touch. Risk depends on how exposure happens—dust, loose fibers, crumbling material, cutting, drilling, grinding, heating, and repeated handling all matter.
For an ordinary beginner or children’s kit, there is little reason to include specimens that need specialist handling.
- Do not lick specimens.
- Do not grind unknown minerals.
- Avoid unnecessary dust.
- Wash hands after handling.
- Keep specimens away from food.
- Supervise any destructive testing.
For children’s products, do not treat 0.5 inch or 1 inch as a universal safety cutoff. U.S. CPSC small-parts rules for products intended for children under three use a standardized test cylinder rather than a simple rock-width rule.[13]
Commercial kits also need age grading and market-specific toy safety compliance separate from the geology itself.
Use Only a Few Useful Tools
A beginner kit does not need a dozen accessories. Around 3–5 useful tools can cover most basic work.
| Tool | What It Helps With |
|---|---|
| 10× hand lens | Grains, crystals, small fossils and texture |
| Streak plate | Streak testing on suitable minerals |
| Magnet | Magnetic response |
| Hardness references | Scratch comparison |
| Ruler | Specimen, grain, clast and crystal measurements |
A tool only adds value if the specimens give you a real reason to use it. A streak plate is not very useful if none of the included minerals produces a useful streak. A magnet should have a magnetite sample to work with.
It also makes sense to separate display pieces from test pieces. There is little reason to scratch the best face of an attractive crystal when a small ordinary specimen can do the same job.
Store Specimens So Labels Stay Useful
A collection becomes frustrating very quickly when the stones and labels get mixed up.
A 30-piece kit should ideally have roughly 30 numbered positions, compartments, bags, or specimen boxes. One specimen, one number, one matching entry in the guide.
Do not store everything loose together. Hard minerals can scratch softer ones, crystal points can break, and small labels disappear surprisingly easily.
Also, not every specimen should be washed. Halite, for example, dissolves in water.
A Practical 30-Piece Mix
There is no official 30-piece formula, but the following split works well for a broad beginner kit:
| Group | Practical Count | Examples |
|---|---|---|
| Minerals | 10–12 | Quartz, orthoclase, calcite, gypsum, fluorite, muscovite, pyrite, hematite, magnetite, talc |
| Igneous rocks | 5–6 | Granite, basalt, obsidian, pumice, scoria |
| Sedimentary rocks | 5–6 | Sandstone, shale, limestone, conglomerate, rock salt |
| Metamorphic rocks | 5–6 | Slate, marble, quartzite, schist, gneiss |
If those groups use fewer than 30 spaces, the remaining 3–5 positions can go to fossils, local rocks, extra hardness references, test specimens, or a particularly useful comparison sample.
In a general 30-piece collection, I would look for four things:
- all 3 major rock groups;
- roughly 10–12 useful minerals;
- at least 5–7 different mineral properties;
- around 70–80% or more of the pieces doing a genuinely different job.
Useful connections are better than random variety. Quartz can link granite, quartz-rich sandstone, and quartzite. Calcite can link a mineral specimen, limestone, and marble. Those relationships make the whole box easier to understand.
Compare Value, Not Price Per Piece
A cheap price per stone can be misleading.
| Kit A | Kit B | |
|---|---|---|
| Price | $30 | $45 |
| Advertised pieces | 60 | 30 |
| Different useful roles | 30 | 26 |
| Useful-role ratio | 50% | 86.7% |
| Typical size | Many below 0.5 in | Many around 1–1.5 in |
| Labels | Names only | Names plus useful properties |
Kit A costs only $0.50 per piece. Kit B costs $1.50 per piece. That makes Kit A look much cheaper until you notice how many pieces repeat the same role.
Price still matters, of course. It just should not be separated from size, variety, labeling, specimen condition, and actual learning value.
These numbers are examples rather than market-price benchmarks.
Check the Seller’s Information
A useful listing should answer at least six basic questions:
- What exactly is included?
- How large are typical specimens?
- Are they rough, cut, tumbled, or polished?
- Has anything been dyed, coated, heated, or otherwise treated?
- How are specimens identified?
- Do the photos show the exact set or representative examples?
Words such as “premium,” “rare,” “amazing,” and “natural treasure” do not answer any of those questions.
A common quartz specimen does not need a laboratory report or mine-level paperwork. A rare, expensive specimen sold partly because of its exact origin deserves stronger documentation.
Quick Buying Check
- Is there a complete specimen list?
- Are most pieces large enough to show useful features?
- Is typical size clear rather than only the maximum?
- Does a general kit cover all three major rock groups?
- Does a 30-piece general kit have roughly 10–12 useful minerals?
- Do those minerals cover at least 5–7 different properties?
- Are most pieces genuinely different in material, texture, test, or purpose?
- Are mineral varieties clearly separated from mineral species?
- Can every specimen be matched to the correct label?
- Are treatments disclosed?
- Do photos show realistic scale and average quality?
- Do the included tools actually work with the specimens?
- Is the kit suitable for the intended age?
Final Thoughts
A useful beginner geology kit can be surprisingly compact. Around 20–40 specimens is enough for many learners, and 1–2 inches (2.5–5 cm) works well for a large share of common teaching samples. In a 30-piece general kit, roughly 10–12 minerals, 5–6 rocks from each major rock group, and at least 5–7 clearly different mineral properties give you a strong base. The numbers are only guides. What really matters is whether you can see the granite grains, gneiss bands, calcite cleavage, quartz fracture, hematite streak, or magnetite response without guessing. A smaller box that shows those differences clearly is usually more useful than a much larger collection of repeated polished stones.