
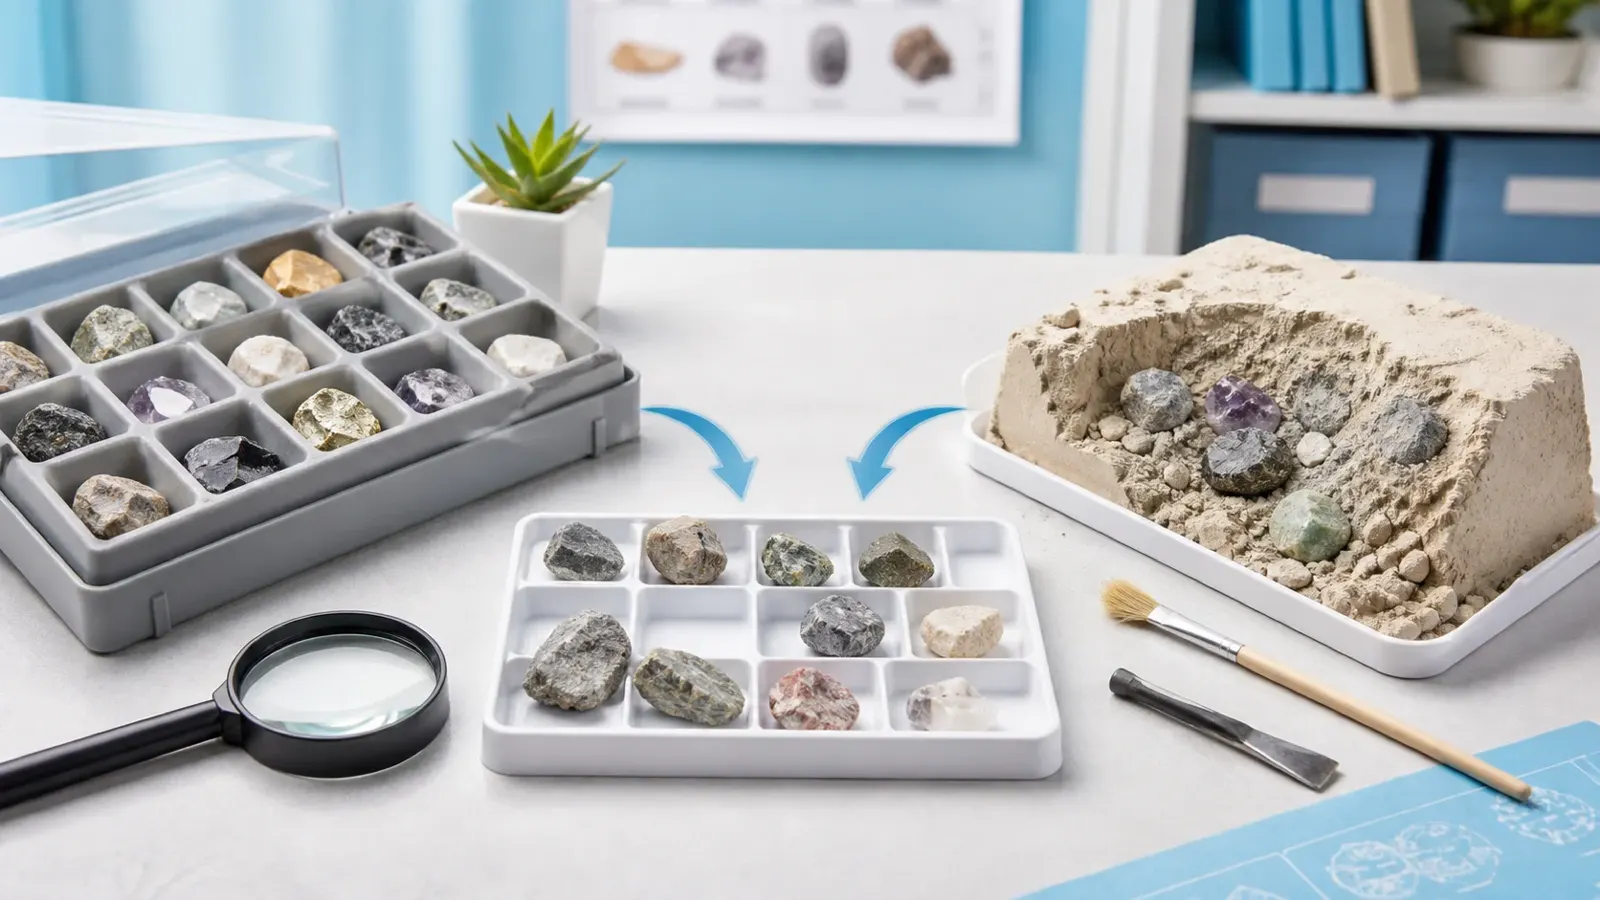
A geology kit is usually the better choice if a child wants to study, compare, identify, and keep rocks or minerals. A gem dig kit makes more sense when the fun is in digging something out and discovering what is hidden inside. If the child enjoys both parts, look for a hybrid kit that combines excavation with named specimens, a useful ID guide, and somewhere to store the finds afterward.
The name on the box can be misleading. “Geology,” “gem,” “crystal,” and “STEM” are used pretty loosely. Some geology and earth-science kits already combine mineral samples, dig blocks, magnifiers, ID cards, and storage. What matters is what the child actually gets to do.
Geology Kit vs Gem Dig Kit
| Feature | Geology Kit | Gem Dig Kit |
|---|---|---|
| Main activity | Observe, compare, sort, and identify | Dig, uncover, clean, and identify |
| Learning focus | Rock and mineral properties | Excavation first, identification second |
| Useful beginner habit | Compare 2–3 properties, not color alone | Use 2–3 properties after the dig |
| Repeat use | The same specimens can support 5 or more simple activities | The block is usually one-use, but the finds can be kept and studied |
| Group use | Several specimens can be studied at once | One block per child is easiest when everyone wants to dig |
| Mess | Low | Moderate to high |
| Best fit | Collecting, homeschool, classroom study | First geology activity, gifts, short projects |
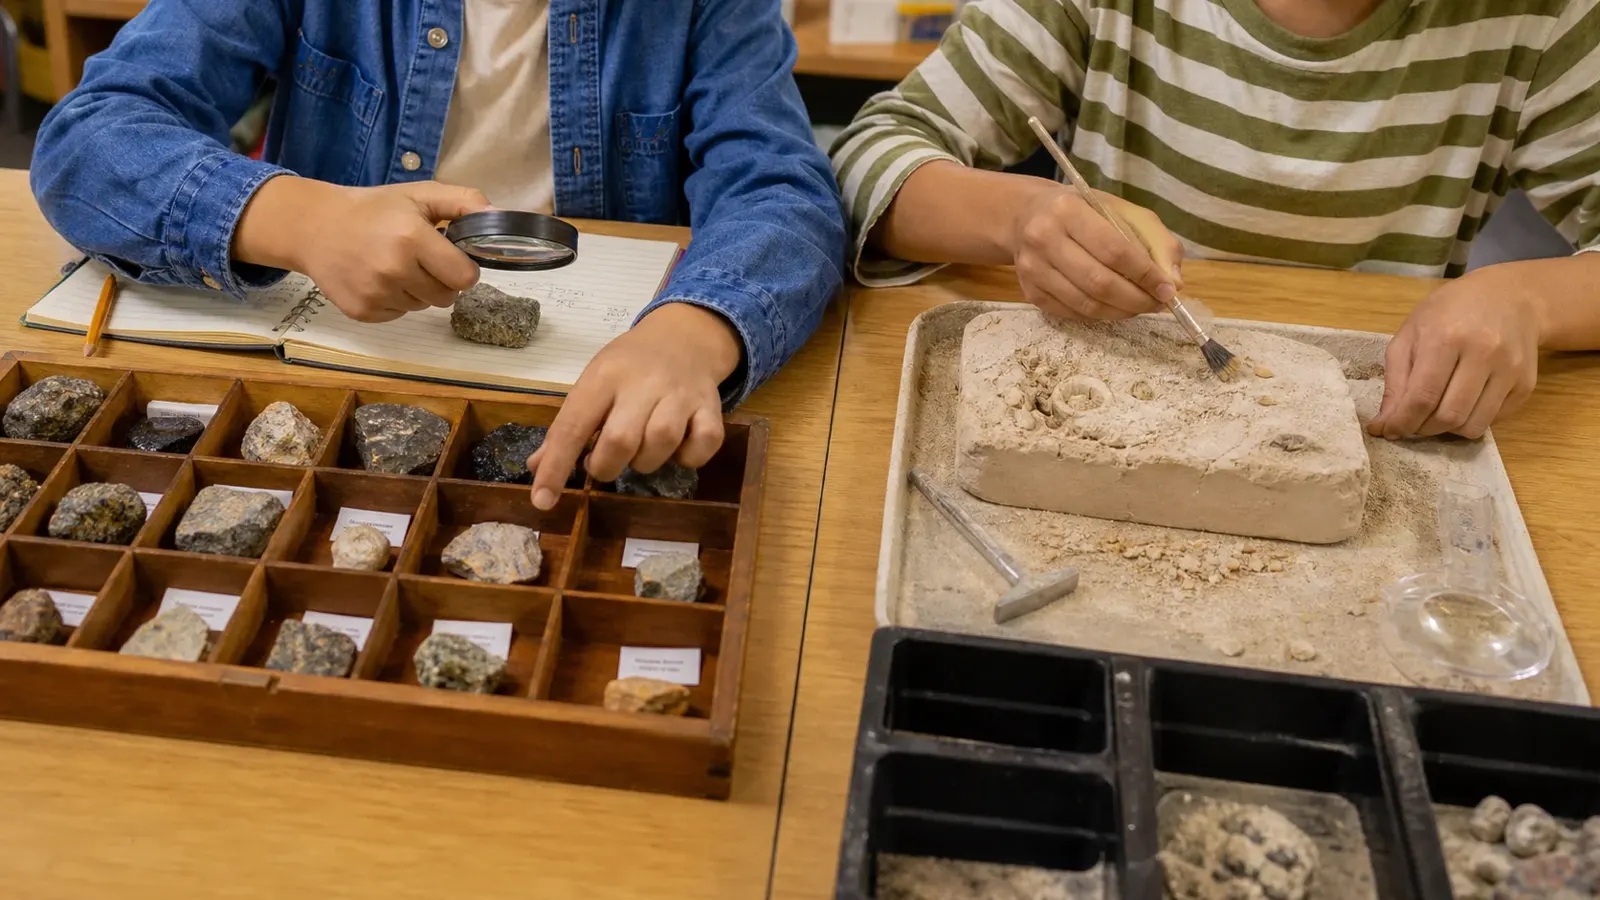
That table gives the broad difference, but there is an important catch: a good gem dig kit can be more educational than a poor geology kit. Twenty unlabeled stones and a thin picture card do not automatically make a strong science set.
What Children Actually Learn
With a geology kit, the useful part is not memorizing that one sample is quartz and another is granite. It is learning to notice why they are different.
A child might compare color, shine, grain size, texture, transparency, hardness, layers, crystal shape, or visible mineral grains. The National Park Service lists properties such as color, hardness, luster, streak, cleavage, and specific gravity as useful mineral-identification clues.[1]
For a beginner, comparing 2–3 properties is a good habit. Not a scientific rule, just a practical one. Color + luster + transparency already tells you much more than color by itself.
A gem dig kit teaches something different. The child has to remove material, notice when a specimen starts to appear, then slow down and work around it. There is a bit of judgment involved. Hit too hard and the find may chip; work too lightly and progress can become frustrating.
This is why block design matters. A block should not fall apart in seconds, but it should not be so hard that an adult ends up doing most of the work. Block size, tool strength, hidden-object placement, and resistance all affect the experience; these factors are discussed in more detail in this dig kit design guide.
Rock or Mineral?
This sounds basic, but many children’s kits mix the two together without explaining the difference.
The U.S. Geological Survey defines a mineral as a naturally occurring inorganic material with an ordered internal structure, characteristic chemical composition, crystal form, and physical properties. A rock is made from one or more minerals or other mineral matter.[2]
Quartz, calcite, pyrite, mica, feldspar, and gypsum are minerals. Granite, basalt, sandstone, marble, and slate are rocks.
Granite is a nice example because you can often see several different mineral grains in one piece. It is not one mineral with a complicated pattern; it is a rock made from several minerals.
Rocks are usually introduced through 3 major groups: igneous, sedimentary, and metamorphic.[3]
| Rock Group | How It Forms | Beginner Example |
|---|---|---|
| Igneous | Molten rock cools and becomes solid | Granite or basalt |
| Sedimentary | Particles or other material build up and become rock | Sandstone |
| Metamorphic | Existing rock changes under heat, pressure, fluids, or a combination of these | Marble or slate |
If a kit claims to teach basic rock classification, having at least one clear example from each of those 3 groups makes the lesson much easier to understand.
What to Look for in a Geology Kit
Piece count is one of the easiest things to overvalue.
A 20-piece set might contain 20 different materials. Or it might contain only 8 types, with 12 duplicates. Both can be useful, but they are not giving the child the same range of examples. Check total pieces and unique specimen types separately.
Variety matters because comparison is easier when the differences are obvious. A beginner set is more useful when it includes contrasts such as metallic vs nonmetallic, transparent vs opaque, coarse vs fine-grained, layered vs non-layered, and both rocks and minerals.
Size matters too, but only up to a point. A specimen does not need to be huge. It just needs to be large enough to show the feature the guide is talking about. Very small chips can make grain boundaries, crystal faces, layers, and fractures hard to see.
Then there is the rough-versus-polished question. Polished stones are attractive and easy to handle. They can show color, pattern, transparency, and internal features clearly. Rough specimens are usually better for seeing natural texture, fractures, crystal faces, and grain relationships.
And no, polished does not mean fake. A natural mineral can be cut, tumbled, or polished and still be natural.
A hand lens is another useful addition. A 10× hand lens is a practical reference point for seeing small grains and surface features. The U.S. Bureau of Reclamation geology field manual specifies a minimum 10× hand lens for mineral or rock identification in professional field work.[4]
Children do not need professional field equipment, of course. The point is simply that a proper loupe can reveal details that a weak toy magnifier may miss.
The guide may matter even more than the magnifier. A useful guide tells the child what to notice: luster, texture, transparency, hardness, grain size, or another feature. A name beside a photo is helpful, but it does not teach much by itself.
Storage is easy to overlook until labels start getting mixed up. If a set contains 18 labeled specimens but the tray only has 12 separate spaces, 6 pieces will have to share compartments or go somewhere else. Once similar samples lose their labels, a beginner may not be able to identify them again.
What to Look for in a Gem Dig Kit
Most gem dig kits have 4 basic parts: a block, digging tools, hidden specimens, and some kind of identification guide.
A gem excavation kit becomes more useful when the activity continues after the stones come out of the block. Named specimens and a decent ID guide give the finds a life beyond the first afternoon.
The block should offer steady progress. Far away from a specimen, the child should be able to remove material fairly quickly. Close to the specimen, the material should come away in smaller amounts so the child can work carefully.
Tool quality matters more than tool count. Six little accessories look impressive in a product photo, but they do not help much if the main scraper bends halfway through the block.
The same goes for the number of “gems.” If the package says 12 gems, find out whether that means 12 different materials or 12 total pieces. You might get 12 types, 6 types with duplicates, or 12 pieces selected from a larger assortment.
Duplicates are not necessarily a bad thing. Two pieces of quartz can actually show something useful: the same mineral does not always look identical.
How to Identify a Specimen
Color is the first thing most children notice, and that is fine. It is just not a reliable final answer. The National Park Service points out that the same mineral can appear in different colors, so other properties are needed.[5]
| Property | What It Means | Simple Check |
|---|---|---|
| Color | The visible color | Use it as one clue, not the whole answer |
| Luster | How light reflects from the surface | Metallic, glassy, pearly, dull, or earthy |
| Transparency | How much light passes through | Transparent, translucent, or opaque |
| Hardness | Resistance to scratching | Compare only with suitable test materials |
| Texture | How the surface or grains look | Fine, coarse, grainy, glassy, or layered |
| Cleavage | Tendency to split along flatter weak surfaces | Look at surfaces that are already exposed |
| Streak | Color of the mineral’s powder | Use only if the kit includes a proper streak plate and instructions |
A simple way to work is to place 2 specimens side by side, compare 2–3 features, write down what is different, then check the guide. If the clues do not line up well, leave the answer uncertain. That is better science than forcing a match.
Texture can also tell part of the story of how a rock formed. USGS explains that slowly cooled intrusive igneous rocks can develop larger mineral grains, while quickly cooled volcanic rocks usually have much smaller grains.[6]
There Are Limits to Identification
A children’s kit is good for learning how identification works. It is not a miniature professional geology lab.
Some stones simply cannot be identified confidently from appearance alone. Polishing can hide useful natural surfaces, and similar-looking materials may need more testing.
Professional gem laboratories use microscopes, spectroscopy, imaging, and chemical-analysis equipment when visual inspection is not enough.[7]
For a child, “I think this matches because of these three clues” is a much better learning result than pretending every stone has one obvious answer.
Age Matters, but Not as Much as You Think
Always start with the age grade and safety information on the actual product. After that, think about the child rather than the number on the birthday cake.
A hands-on beginner may enjoy digging because the goal is obvious: find what is hidden. An independent reader may get more from a geology kit with labels and reference cards. A child who already carries rocks home in their pockets probably does not need much persuasion to use a specimen collection.
For children who like short rewards and visible progress, a dig kit can work especially well. For children who enjoy organizing and comparing things, geology kits usually have more staying power.
Two children the same age can have completely different preferences. Age tells you whether the product is intended for them; it does not tell you whether they will enjoy the activity.
Repeat Use
This is where geology kits usually have a clear advantage.
A single dig block is normally one-use. Once everything has been excavated, that part is finished. The stones themselves can still be kept, so the learning does not have to stop there.
A basic geology collection can support at least 5 simple activities without adding new specimens:
- sort rocks and minerals;
- compare luster and transparency;
- compare grain size and texture;
- sort examples into the 3 major rock groups;
- label and research individual specimens.
That is a more useful way to think about replay value than asking whether the child can simply “play with it again.”
Using Kits with More Than One Child
For group use, ignore the big total-piece number for a moment and count how many children can actually do something at the same time.
With 4 children:
- 1 block means all 4 share one digging area;
- 2 blocks means 2 children per block;
- 4 blocks gives a 1:1 block-to-child ratio.
That 1:1 ratio is not an official educational standard. It is just the simplest setup when everyone is supposed to be digging at once.
For parties, siblings, or classroom stations, a multi-piece dig kit can reduce waiting. Geology kits are easier to share because several specimens can be examined at once, although one magnifier for 6 children can still become a bottleneck.
Homeschool and Classroom Use
You do not need a new kit for every lesson. One decent geology collection can cover quite a lot.
| Activity | What the Child Does | What They Learn |
|---|---|---|
| Rock vs mineral | Sort labeled specimens | The basic difference between the two |
| Property comparison | Compare 2–3 features | Why color alone is not enough |
| 3 rock groups | Sort igneous, sedimentary, and metamorphic examples | How rocks form in different ways |
| Grain size | Compare coarse and fine examples | How texture can relate to formation conditions |
| Collection record | Label and record each specimen | How to keep a reference collection usable |
The best outcome is not a child who can repeat 20 names from memory. It is a child who can look at 2 specimens and explain what makes them different.
Natural, Polished, Synthetic, or Imitation?
These words are often mixed together, but they mean different things.
| Term | Plain-English Meaning |
|---|---|
| Natural | The material formed naturally. |
| Polished | The surface was smoothed or polished. The material can still be natural. |
| Dyed | Color was added or changed. The base material may still be natural. |
| Synthetic gem | A lab-made material with essentially the same chemical, physical, and optical properties as its natural counterpart. |
| Imitation or simulant | A different material used to look like another gem. |
GIA separates synthetic gems from imitations for exactly this reason. Synthetic material has essentially the same key properties as its natural counterpart, while an imitation only looks like the material it copies.[8] GIA also notes that simulants can be natural or man-made.[9]
The word “gem” on a children’s kit does not automatically mean rare, precious, expensive, or jewelry grade. A common mineral can be a better teaching sample if the child can actually see and understand its features.
Safety
Use the age grade and instructions supplied with the actual kit rather than relying on a general age recommendation.
Small loose stones deserve particular attention. Under U.S. CPSC rules, toys and other products intended for children under 3 cannot contain regulated small parts that create the defined choking hazard. Applicable toys and games intended for children ages 3 through 6 that contain small parts require choking-hazard warnings.[10]
The official CPSC small-parts test cylinder is about 31.7 mm wide and 57.1 mm long.[11] Parents do not need to measure every stone at home; this simply explains why small-part warnings and age grading matter.
Check digging tools before use, work over a tray, and avoid blowing loose powder into the air. Do not automatically soak a dig block unless the instructions say to do so, because block materials differ.
Also watch for damaged tools, broken block pieces, or rough specimens with sharp edges. U.S. toy safety rules address accessible hazardous sharp points and edges in children’s toys.[12]
Age grading, small parts, materials, and mechanical safety are discussed in more detail in this toy safety and compliance guide.
Common Kit Types
These are practical categories rather than official industry grades.
| Kit Type | What You Usually Get | Best For |
|---|---|---|
| Geology collection kit | Labeled rocks and minerals | Collecting and simple comparison |
| Identification kit | Specimens plus magnifier, chart, or simple tests | More detailed study |
| Field geology kit | Outdoor collecting or examination tools | Older or supervised users |
| Single-block dig kit | 1 excavation block | One main activity |
| Multi-block dig kit | 2 or more separate dig pieces | Siblings and groups |
| Mineral-focused dig kit | Dig block plus named specimens and ID material | Digging followed by geology study |
| Hybrid kit | Digging, specimens, ID tools, and storage | Children who enjoy both parts |
A crystal-growing kit is different again. Instead of uncovering an existing stone, the child grows crystals from a prepared solution. This crystal-growing kit guide explains how that process works.
A Simple 10-Point Check
If two kits look very similar, a quick scoring method can make the choice easier. This is not an industry rating system; it is just a way to compare both products using the same criteria.
Score each area from 0 to 2: 0 for weak or missing, 1 for acceptable, and 2 for strong. Five areas give a maximum of 10 points.
| Geology Kit Check | Maximum | What to Look For |
|---|---|---|
| Specimen variety | 2 | Clearly different rocks and minerals |
| Guide quality | 2 | Explains useful properties, not just names |
| Specimen usability | 2 | Large enough to inspect and clearly labeled |
| Storage and reuse | 2 | Enough labeled storage for repeated study |
| Child fit | 2 | Matches ability, reading level, and interest |
For a gem dig kit, use block design, tool quality, variety of finds, post-dig learning, and child fit as the 5 areas.
A 10/10 score does not prove that one product is scientifically “the best.” It simply makes vague product claims easier to compare.
Before You Buy
A useful science kit checklist should focus on what the child can actually do and learn.
- Total pieces: How many objects are included?
- Unique types: How many different materials are there?
- Size: Are the specimens large enough to inspect?
- Guide: Does it explain useful properties rather than color alone?
- Labels: Can each specimen stay matched with its name?
- Storage: Is there enough space for the whole collection?
- Tools: Will the main digging tool survive the activity?
- Block: Can the child make steady progress without excessive force?
- Materials: Are natural, polished, dyed, synthetic, or imitation materials described clearly?
- Age grade: Does the product match the child’s age and ability?
- Group use: How many children can actually participate at once?
Price per piece is a weak way to compare value. A 30-piece set is not automatically better than a 15-piece set if the larger one has tiny samples, many duplicates, poor labels, or almost no useful identification information.
Which One Fits Best?
| Situation | Better Fit |
|---|---|
| Child already collects rocks | Geology kit |
| First geology activity | Gem dig or hybrid kit |
| Homeschool unit | Geology kit |
| One-time birthday activity | Gem dig kit |
| 4 children who all want to dig | 4-block or multi-piece kit |
| Long-term collection | Geology kit |
| Child likes digging and identifying | Hybrid kit |
A gem dig kit is not a great choice if low mess is important, the child dislikes scraping, or several children have to share one small block. A geology kit is less likely to work if the child has little interest in specimens and does not enjoy sorting, reading, or comparing details.
FAQ
Are the gems in a gem dig kit real?
Sometimes. A kit may contain natural minerals, polished natural stones, dyed materials, synthetic gems, glass, or imitation stones. The material list matters more than words such as “real treasure.”
Does a higher specimen count mean a better kit?
No. A 24-piece kit with 12 different material types offers twice as many unique types as a 24-piece kit containing only 6 types.
How many properties should a beginner compare?
There is no fixed minimum, but 2–3 useful properties is a sensible beginner habit. Luster, transparency, and texture already give a much better comparison than color alone.
Can polished stones still be useful?
Yes. They can show color, pattern, transparency, and internal details. Rough specimens usually show natural texture, fractures, grain relationships, and crystal surfaces better.
Can several children share one gem dig kit?
Yes, but count blocks and tools. With 4 children and 1 block, everyone shares one excavation area. Four blocks give all 4 children something to dig at the same time.
What if the stone does not match the picture?
That is normal sometimes. Natural specimens vary in color, clarity, shape, and pattern. Compare several properties and leave the answer uncertain if the clues do not match well.
Conclusion
A geology kit gives more long-term use when a child wants to compare, identify, label, and keep specimens; the same collection can easily support 5 or more beginner activities and cover all 3 major rock groups. A gem dig kit makes more sense when excavation is the part the child is excited about. When comparing products, look at unique specimen types rather than total pieces, use 2–3 properties instead of color alone for identification, and count blocks and tools separately for group use. A 10× hand lens is a useful benchmark for close observation. In practice, good labels, usable sample size, strong tools, sensible storage, and clear material information matter more than a large piece count.