
A plant kit may involve measuring growth for 7–14 days. A bridge kit may ask a child to test a 20 cm span by adding weight in 50 g steps. A robot kit may require five sensor tests with an obstacle placed 10 cm away. These clear tasks give children something real to observe, record, and improve.
Different kits support different skills. K&M’s science kit and educational toy categories include experiment, excavation, geology, nature, craft, and group-play products. The right choice depends on what the child will actually do, not simply how many experiments are printed on the box.
What Makes a Science Kit Educational?
A kit has more learning value when the child must make decisions instead of only copying instructions.
| Activity Type | What the Child Does | Main Skills |
|---|---|---|
| Demonstration | Follows steps and watches a fixed result | Observation, basic measuring, following instructions |
| Investigation | Changes one condition and compares results | Fair testing, data handling, reasoning |
| Design challenge | Builds, tests, and improves a solution | Problem-solving, planning, creativity |
| Long-term project | Records changes over several days or weeks | Patience, repeated measurement, pattern finding |
For example, mixing two materials and watching foam rise is mainly a demonstration. It becomes an investigation when the child tests three different amounts, measures the foam height, repeats each condition three times, and compares the results.
The National Academies identifies asking questions, planning investigations, analyzing data, building explanations, designing solutions, and communicating information as important science and engineering practices.[1]
Observation
Observation means noticing what happened and describing it accurately.
Compare these statements:
- “The plant grew.”
- “The main stem grew 18 mm in four days.”
- “The plant near the window grew taller but had paler leaves.”
The first statement is too general. The other two include size, time, color, or location.
Depending on the kit, children may observe:
- Color, shape, size, and texture
- Position and movement
- Temperature and time
- Number and amount
- Changes from one day to the next
For a plant activity, measure the same stem once a day for 7–14 days. Take each measurement at about the same time and record height to the nearest millimeter when the ruler allows it. A photograph taken from the same angle can provide a second record.
Observation is different from explanation:
- Observation: The liquid became cloudy.
- Possible explanation: A solid may have formed, or some powder may not have dissolved.
Children should record what they actually see, including “no visible change.” They should not write the expected result simply because it appears in the instructions.
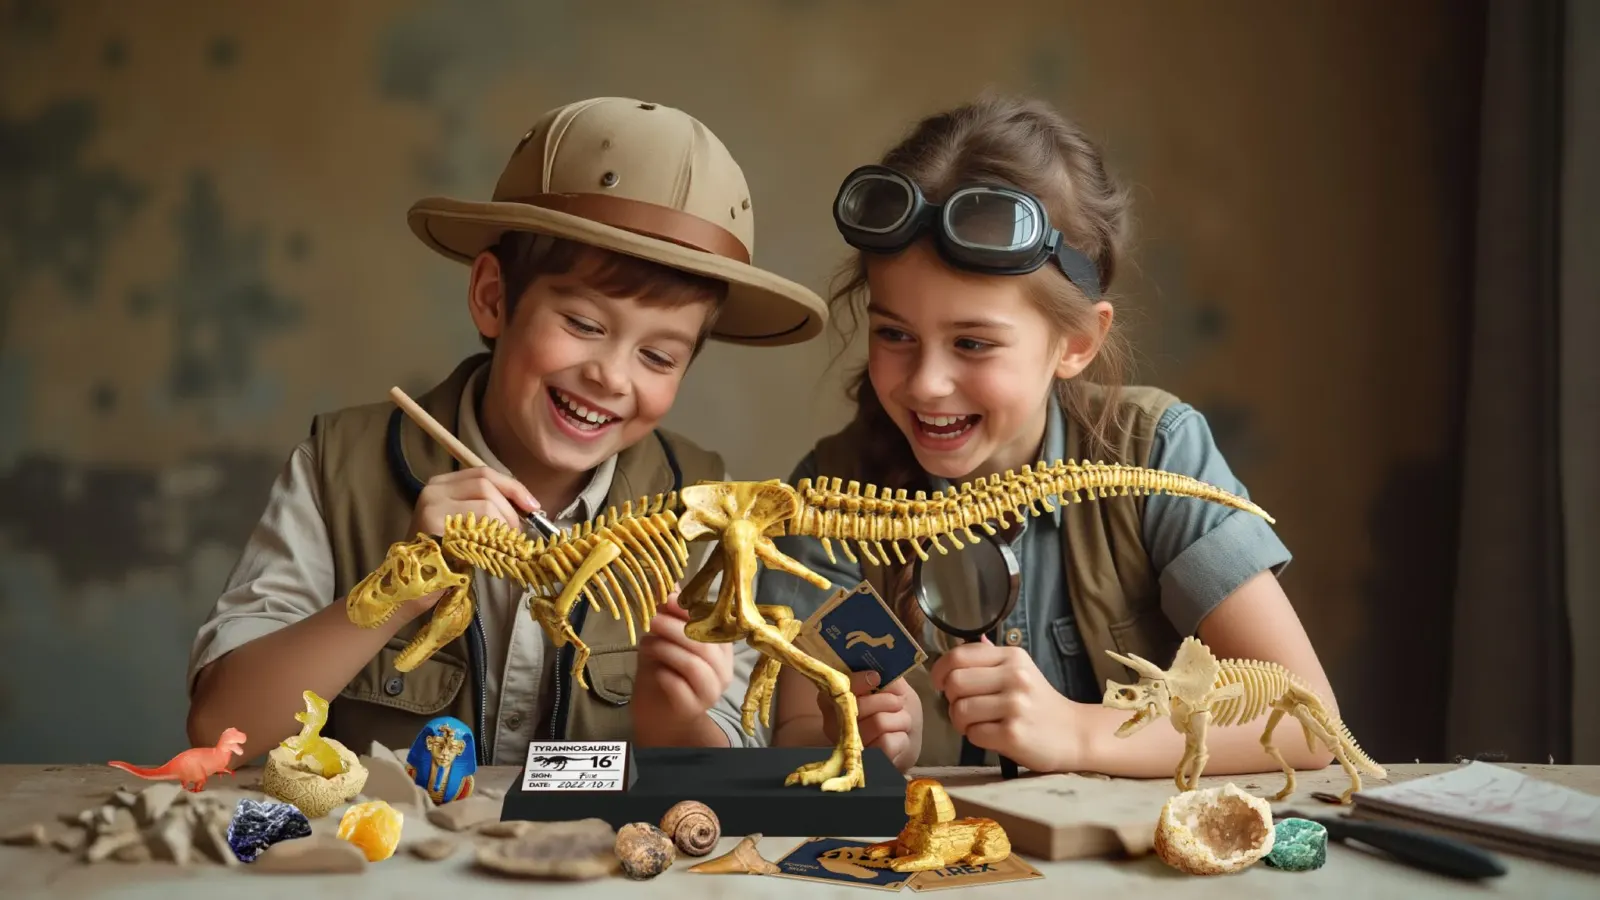
An excavation activity such as the Jumbo Gems Gem Dig Kit can be extended after the digging is finished. Children can clean the specimens, number them, and sort them by color, texture, shape, and shine.
Questions and Predictions
A useful science question can be tested with the available materials and produces something the child can observe or measure.
Broad question: Why do plants grow?
Testable question: Do bean seedlings grow differently when one group receives daylight and another receives very little light?
Science-kit questions often ask:
- Which material performs best?
- Does one condition affect another?
- How can a design be improved?
Examples include:
- Which material keeps 100 mL of water warm for the longest time?
- Does wheel diameter affect how far a model car travels?
- How can a 20 cm paper bridge hold more weight?
A prediction should include a reason:
I think the larger parachute will fall more slowly because it has a larger surface pushing against the air.
The prediction does not need to be correct. After the test, the child can check whether both parachutes used the same weight, were released from the same height, and were timed in the same way.
Adults should not correct a safe prediction before the test. Ask:
- Why do you think that?
- What result would support your idea?
- What result would make you change your explanation?
Fair Testing
A fair test helps children see whether one condition is linked to a result.
Suppose a child tests whether a sugar cube dissolves faster in warm water than in cold water. A practical setup could use:
- 100 mL of water in each cup
- Sugar cubes of similar size
- The same cup shape
- The same stirring method
- The same timing method
- Three trials at each temperature
The child can use three questions:
- What are we changing? Water temperature
- What are we measuring? Dissolving time
- What stays similar? Sugar size, water amount, cup, and stirring
Three trials do not prove a rule for every substance, but they are more useful than one result. If the three times are very different, check the water temperature, stirring, sample size, and timing method before calculating an average.
A comparison group is useful when testing a treatment. A basic plant test might use 3–5 similar seedlings in each condition for 7–14 days. One group receives the tested treatment, while the other receives the same measured amount of plain water. Several plants are more useful than one because individual plants naturally grow at different rates.
Not every activity needs one changed variable. Weather records, rock classification, microscopy, and open building challenges use different methods. In a design project, children should still label each version and record what changed.
Measuring and Data
Science kits give children a reason to measure length, mass, volume, time, temperature, distance, and quantity.
They need to learn how to:
- Choose a suitable tool
- Use the same unit each time
- Start measuring from the correct point
- Read the scale carefully
- Record the result immediately
The tool should match the task. A millimeter ruler may suit plant growth. A tape measure is more practical for a paper-airplane flight of 2–5 meters. A stopwatch is useful when the activity lasts several seconds. Extra decimal places do not make a rough measurement more accurate.
The example below shows how three trials could be recorded. The values are teaching examples, not standard results for every kit.
| Water Condition | Trial 1 | Trial 2 | Trial 3 | Average | Range |
|---|---|---|---|---|---|
| Cold | 146 sec | 151 sec | 143 sec | 147 sec | 8 sec |
| Room temperature | 91 sec | 94 sec | 90 sec | 92 sec | 4 sec |
| Warm | 42 sec | 39 sec | 44 sec | 42 sec | 5 sec |
In this example, the warm-water trials had the shortest average time. The cold-water results ranged from 143 to 151 seconds, a difference of 8 seconds. Small differences may come from stirring, timing, temperature, or sample size.
An unusual result should not be deleted just because it does not match the prediction. If four model-car runs reach about 2 meters but one reaches only 60 cm, check whether the car hit an object, a wheel became loose, or the starting position changed. Record the result and add a note.
Missing data should be marked “not measured.” Children should never invent a number to complete a table.
Different data need different displays:
- A line graph can show plant growth over 7–14 days.
- A bar chart can compare three bridge designs.
- A tally table can record how many of 10 objects float or sink.
- An average can compare 3–5 repeated numerical trials.
Reasoning
Reasoning means using evidence to support an explanation.
A simple structure is:
- Claim: The sugar cube dissolved faster in warm water.
- Evidence: The average time was 42 seconds in warm water and 147 seconds in cold water.
- Reason: Water temperature was the main condition changed, while the sugar size, water amount, cup, and stirring method stayed similar.
The conclusion should match the size of the test:
In our tests, this type of sugar cube dissolved faster in warm water than in cold water.
The activity does not prove that every material always dissolves faster in warm water.
Useful phrases include:
- In this test…
- Under these conditions…
- The results suggest…
- We cannot yet tell whether…
- More trials are needed to check…
Children should also check other possible causes. If a car with larger wheels travels less distance, the problem may be friction, wheel contact, axle alignment, the ramp position, or the floor surface.
Problem-Solving and Design
Engineering and robotics kits give children a practical goal and allow them to improve a first attempt.
A simple design process is:
- Define the goal.
- Build a first version.
- Test it under clear conditions.
- Find the weak point.
- Change the design and test again.
The following values are example activity settings, not universal product standards.
| Activity | Example Setup | What to Record |
|---|---|---|
| Bridge test | 20 cm span; add 50 g per step | Highest load held for 10 seconds |
| Model vehicle | 3–5 runs from the same line | Distance, direction, and average |
| Robot sensor | 5 tests with an object about 10 cm away | Successful and failed stops |
| Egg protection | 3 drops from the same safe height | Damage and design changes |
A bridge test can use a 20 cm gap. Add weight in 50 g steps and record the highest load held for 10 seconds without collapse. The child can then change the supports, joints, material thickness, or load position.
A robot challenge can place an object about 10 cm from the sensor. Run the program five times and record how often the robot stops before contact. A result of four successful stops and one failure gives the child a clear reason to inspect the sensor position, program timing, or surface conditions.
Children face two types of problems:
- Failure problem: The model does not work at all.
- Performance problem: It works but does not meet the goal.
A dark bulb requires fault finding. A bridge that holds 300 g but not the target 500 g requires design improvement.
Useful fault-finding steps are:
- Describe the problem without guessing.
- Find the last part that worked.
- Check one likely cause at a time.
- Test after each change.
- Record what solved the problem.
Spatial and Tool Skills
Building, electronics, robotics, microscopy, astronomy, and excavation kits can improve spatial thinking.
Children learn to understand:
- Where parts belong
- How flat diagrams represent three-dimensional objects
- How movement passes through gears and axles
- How load moves through a bridge to its supports
- How a robot’s turning angle changes its path
Two directly meshed external gears turn in opposite directions. Their relative sizes affect output speed and torque. This does not describe every gear arrangement, such as internal or planetary systems.
With many compound microscopes, the image appears to move in the opposite direction when the slide is moved. Digital and stereo microscopes may behave differently.
Science kits also develop hand control through:
- Using a dropper one drop at a time
- Holding a nut while turning a screw
- Connecting a wire without bending the terminal
- Moving a sample with tweezers
- Scraping and brushing an excavation block carefully
The Ultimate Party Dig Kit is one example of a group activity involving tool control, patience, turn-taking, and discussion.
Count small tools and loose parts before and after use. If a kit starts with 12 small components, all 12 should be accounted for when the activity ends.
Difficulty handling small parts does not mean a child lacks scientific understanding. Larger tools, trays, picture instructions, and non-slip mats can make the same activity easier to use.
Planning and Persistence
Many activities require children to prepare materials, follow a sequence, wait for a result, and return later to record changes.
A long-term activity may include:
- Preparation: 5–15 minutes to collect and label materials
- Active work: 15–45 minutes to build, mix, measure, or program
- Waiting: Several hours, days, or weeks before the final result
These times are practical examples, not fixed limits for every child. A crystal or plant project may require only 20 minutes of active work but 7–14 days of observation.
When an activity fails, persistence means checking what happened and trying a sensible change. It does not mean forcing a tired or upset child to continue.
Pause when:
- The child can no longer follow safety rules.
- A required part is broken or missing.
- The task is far above the child’s reading or hand-control level.
- The same action is repeated without understanding the problem.
A 10–15 minute break, one clear hint, or a simpler version may be more helpful than taking over the activity.
Communication, Teamwork, and Creativity
Children understand an activity better when they explain it clearly.
Instead of saying, “The second car was better,” a child can say:
The second car traveled 40 cm farther from the same starting line.
A useful report should answer:
- What question was tested?
- What materials were used?
- What was changed?
- What was measured?
- What happened?
- What may have affected the result?
- What should be changed next time?
Shared kits can also develop teamwork. For a group of 3–5 children, useful roles include builder, recorder, timer, materials manager, and safety checker. Rotate the roles so one child does not control every important step.
Creativity grows when the activity allows more than one solution. “Build any car” may be too broad. A clearer challenge is:
Use no more than 20 parts to build a vehicle that can carry 200 g for one meter.
The child can sketch two designs, test one, and use the result to improve the next version.
Skills by Kit Type
| Kit Type | Main Skills | Useful Data |
|---|---|---|
| Experiment kit | Measuring, fair testing, reasoning | 3 or more trials per condition |
| Electronics kit | Logic, circuit understanding, fault finding | Working and failed connections |
| Robotics kit | Coding, sequencing, debugging | Success rate across 5 tests |
| Engineering kit | Design, testing, improvement | Load, distance, time, or strength |
| Plant kit | Patience, measurement, long-term records | 3–5 samples per group over 7–14 days |
| Microscope kit | Observation, focusing, classification | Number and type of visible features |
| Geology or dig kit | Tool control, comparison, classification | Specimen count, size, color, and texture |
| Weather kit | Repeated measurement and pattern finding | Daily readings over at least 7 days |
K&M’s educational toy range includes science, excavation, geology, nature, craft, and group-play products. The most suitable category depends on the skill the child needs to practice.
Skills by Age
These ranges are general guides. The product label and the child’s actual reading, hand-control, and safety skills are more important than age alone.
| Age Range | Suitable Activities | Useful Activity Scale |
|---|---|---|
| 3–5 | Sorting, shadows, floating and sinking, large seeds, simple ramps | One clear goal and a few large parts |
| 6–8 | Simple circuits, safe magnet tests, weather records, model building | Short steps and 2-condition comparisons |
| 9–11 | Age-labeled robotics, microscopy, bridge tests, plant comparisons | 3–5 trials and simple tables or graphs |
| 12+ | Programmable robotics, electronics, sensors, age-labeled chemistry kits | Longer projects with several measurements |
The American Academy of Pediatrics advises avoiding hobby kits and chemistry sets for children younger than 12 because they may contain dangerous chemicals or create fire and explosion risks.[2] Simple age-appropriate activities using ordinary materials are not automatically the same as a commercial chemistry set, but adults should still read the full instructions first.
How to Choose a Better Kit
Do not judge a kit only by the number of experiments printed on the box.
Check whether it offers:
- A clear question or building goal
- Results that can be observed or measured
- Enough materials for at least 3 trials when comparison is important
- Parts that can be reused in another design
- Clear age and supervision information
- Realistic preparation, activity, and waiting times
- Explanations for common failures
- Safe cleanup, storage, and disposal steps
A kit may be too easy when the child makes no decisions and cannot change the result. It may be too difficult when an adult must complete most of the important steps.
Ten experiments that can be repeated, changed, and measured may offer more learning value than 50 one-use demonstrations.
For businesses developing educational products, K&M’s custom educational toy development guide explains how learning goals, age grading, play testing, instructions, structure, and safety checks can be considered before production.
How Adults Should Help
Adults should guide the activity without doing all the thinking.
Before starting, ask:
- What are we testing?
- What do you think will happen?
- What will we measure?
- How many trials will we do?
- Which steps need adult help?
During the activity, ask:
- What changed?
- Are the comparison conditions similar?
- What should we record now?
- Which part should we check?
After the activity, ask the child to complete:
- We tested…
- We found…
- Our evidence was…
- Next time we would…
When help is needed:
- Ask the child to look again.
- Ask the child to reread the relevant instruction.
- Ask one question that narrows the problem.
- Point to the part that needs checking.
- Demonstrate a similar action.
- Take over when safety requires it.
Safety
Safety is part of scientific practice. Children should read warnings, keep materials away from the mouth and eyes, wash their hands, report broken parts, and use protective equipment when required.
An age label may reflect choking risk, chemicals, sharp tools, glass, heat, electricity, reading level, and required supervision.
Magnets: High-powered magnets can cause severe internal injury when more than one magnet, or a magnet and a metal object, is swallowed. Stop using the kit if a magnet is loose, missing, or exposed. Suspected swallowing needs immediate medical attention.[3]
Button batteries: Coin and button batteries can cause serious internal burns if swallowed or placed inside the body. Check the battery cover and locking system before and after use. Used batteries can still be dangerous. Suspected exposure needs urgent help.[4]
Heat: Adults should control activities involving hot water, wax, steam, soldering tools, or heated containers. Children should never heat a sealed container.
Electricity: Battery-powered circuits are not the same as household electricity. Children should never open wall outlets or connect kit parts to mains power.
Glass and tools: Remove cracked slides, damaged handles, sharp fragments, and broken plastic before use.
Biological samples: Children should not culture unknown body samples, open unknown growths, or grow mold from spoiled food in an open container.
Small parts: Count loose parts before and after use. A kit that begins with 12 small pieces should still have 12 when the activity ends.
K&M’s toy safety compliance guide explains how age grading, small parts, materials, magnets, batteries, tools, warnings, and testing documents affect educational toys.
Signs of Real Learning
A child may complete a kit without fully understanding it. These four levels help adults see how much thinking is taking place:
| Level | What the Child Can Do |
|---|---|
| Follow | Complete the steps safely with some guidance |
| Explain | Describe the result using observations or measurements |
| Change | Suggest another condition and predict the result |
| Transfer | Use the same method in a different activity or problem |
Stronger learning signs include:
- Explaining why one test was not fair
- Finding a loose circuit connection
- Suggesting another material to compare
- Recording an unexpected result honestly
- Using the same measuring method in a new activity
One kit cannot prove permanent improvement. These signs only show that the child is using the skill during the activity.
References
- National Academies of Sciences, Engineering, and Medicine.
A Framework for K–12 Science Education
. - American Academy of Pediatrics.
How to Buy Safe Toys
. - U.S. Consumer Product Safety Commission.
Magnet Safety
. - U.S. Consumer Product Safety Commission.
Button Cell and Coin Battery Safety
.
Conclusion
Science kits are most useful when children make a choice, collect evidence, explain the result, and improve the method. Three trials are usually more useful than one impressive demonstration, while 3–5 plant samples give a better comparison than one plant. Useful challenges may include a 20 cm bridge span, 50 g load steps, five robot sensor tests, or 7–14 days of plant records. These figures are practical examples, not fixed standards. Choose a kit that matches the child’s age, allows safe hands-on work, and leaves room for another test. When a child can spot an error, explain the data, and suggest the next step, the kit is supporting real scientific learning.