
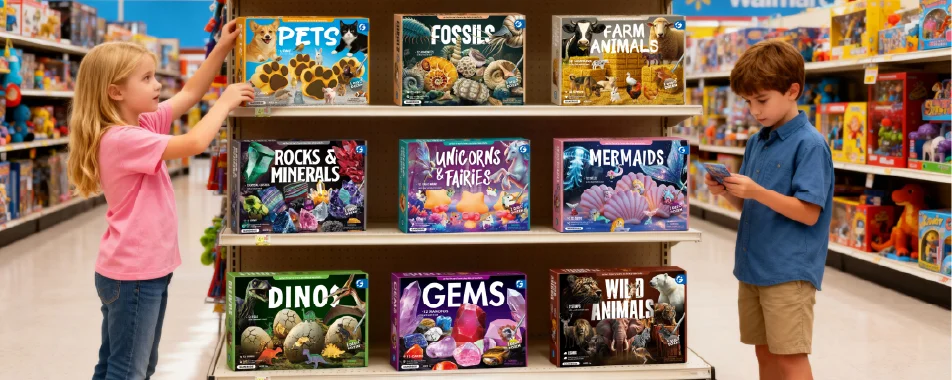
A good custom excavation kit must balance digging difficulty, hidden-object quality, tool strength, safety, packaging, and cost. Before placing an order, buyers should test the complete activity, define measurable quality limits, and confirm that the factory can repeat the approved sample during mass production.
The table below gives practical starting points for early product planning. These figures are examples, not fixed industry standards. Final specifications should be confirmed through samples, user testing, laboratory review, and shipping tests.
| Kit Type | Example Block Weight | Example Dig Time | Common Use |
|---|---|---|---|
| Mini party kit | 60–120 g | 8–15 minutes | Parties, events, small gifts, and classroom rewards |
| Standard retail kit | 200–450 g | 20–45 minutes | Home use, toy stores, museums, and subscription boxes |
| Large dig kit | 600–1,200 g | 45–90 minutes | Family activities, classrooms, and multi-stage projects |
Buyers comparing stock products, private-label packaging, OEM production, and custom development can start with K&M’s educational toy manufacturing services.
Define the User
Decide who will use the kit before choosing the block size, tools, package, or price.
A product for a five-year-old should not use the same small parts, hardness, instructions, or activity time as a product for a ten-year-old. Age grading should be based on the product design, the skills needed to use it, normal play behavior, and foreseeable use—not only the age printed on the box.[1]
| Item | What to Decide |
|---|---|
| Target age | The age group supported by the parts, tools, instructions, and safety review |
| Activity time | A short 8–15 minute activity, a 20–45 minute standard kit, or a longer project |
| Use place | Home, classroom, museum, party, subscription box, or promotional event |
| User count | One child, a small group, or a full class |
| Hidden items | Gemstones, fossils, skeleton parts, figures, shells, coins, or collectibles |
| Main purpose | Discovery play, identification, assembly, science learning, or group activity |
| Adult help | Required, recommended, or normally unnecessary |
A clear product brief might say:
This kit is designed for children aged 8 to 12 to complete at home in 30–45 minutes using the tools included in the box, with light adult supervision.
For a classroom product, calculate the number of usable workstations. A class of 24 children divided into groups of three needs at least eight working sets. Each set normally needs one block, one chisel, one brush, and one tray.
For party kits, separate blocks are often easier to distribute than one large shared block. K&M’s Ultimate Party Dig Kit shows how six individual dig eggs and matching tools can support group activities.
Set the Dig Time
Dig time is one of the clearest ways to judge whether the block formula works.
A block that opens in two or three minutes may feel cheap. A block that needs too much force can cause tired hands, broken tools, damaged objects, and unfinished activities.
Do not ask the factory to make the block “easy” or “medium hard.” Use a repeatable requirement:
A child in the target age group should uncover every object within the approved time range using only the supplied tools. A small amount of water may be used, but the block should not need to be fully soaked.
Useful starting targets include:
- Mini party block: 8–15 minutes
- Small retail block: 15–25 minutes
- Standard retail block: 20–45 minutes
- Large block or skeleton kit: 45–90 minutes
These times are product-development examples. Block shape, thickness, formula, object count, storage conditions, and the user’s age can change the result.
During sample development, test at least five blocks from each version. Use the same tools, water amount, block age, room conditions, and test method.
Record:
- Total digging time
- Time needed to find the first object
- Number of broken or worn tools
- Damage to hidden objects
- Amount of adult help
- Dust and loose debris
- Whether the block breaks into large pieces
- Whether the center is harder than the outside
A good block gives steady progress. The child should remove small amounts of material, see part of an object, and then work around it. If the block breaks into two large pieces, the activity ends too quickly. If the outside is soft but the center is extremely hard, drying may be uneven.
Control Block Hardness
Using the same ingredients does not always produce the same hardness. The result can change with water content, mixing time, mold filling, drying conditions, block thickness, raw material batches, and storage humidity.
Ask the factory to record:
- Raw material batch numbers
- Water-to-powder ratio
- Mixing time
- Amount filled into each mold
- Drying temperature and time
- Finished block weight
- Moisture condition before packing
- Production date and batch number
Use three checks together:
- A finished block weight range
- A drying or moisture requirement
- A real digging test
For example, a standard block with an approved weight of 300 g may use a starting weight tolerance of about ±3% to ±5% during development. The final tolerance should be based on stable production data, not copied from another product.
A machine hardness reading is not enough. Two blocks can give similar readings but break differently. One may turn into fine powder, while another may split into large pieces.
The factory should keep at least one marked sample from each production batch. The retained sample should show the order number, production date, block formula version, object batch, and packing version.
Choose the Block Material
Dig blocks are commonly made from plaster-based, mineral-based, sand-like, clay-like, or mixed materials. Buyers do not always need the full factory formula, but they need enough information for testing, traceability, and material-change control.
| Material Type | Main Benefits | Main Risks |
|---|---|---|
| Plaster-based | Good surface detail and stable molded shapes | May become too hard, crack during shipping, or create fine dust |
| Sand-like | Softer digging and lower tool resistance | May crumble, leak from the package, or expose objects |
| Clay-like | Controlled scraping and less loose powder in some formulas | May shrink, stain objects, absorb moisture, or dry unevenly |
A formula that works in a 70 g egg may not work in a 700 g rectangular block. Thick areas can remain hard or damp, while thin corners can dry too quickly and crack.
Define acceptable limits for:
- Cracks and chipped corners
- Surface holes and air bubbles
- Mold seams
- Loose powder inside the bag
- Exposed hidden objects
- Color differences
- Strong or unusual odor
Use photographs to show accepted and rejected defects. “Small crack” and “slight color difference” are too unclear for production inspection.
Design the Block
Block shape affects mold cost, drying, strength, dig time, object placement, packaging, and freight.
Rectangular blocks are normally easier to manufacture and protect. Eggs, skulls, planets, volcanoes, and pyramids may look better on a shelf, but thin tips and deep surface details are more likely to break.
Check these points before approving a mold:
- The thinnest and thickest areas
- The distance between each object and the surface
- The distance between hidden objects
- Mold seams and release points
- Likely impact points during shipping
- Finished dimensions after drying
- How the inner tray supports the block
A practical starting target is to keep hidden objects at least several millimeters below the surface. The correct depth depends on object strength, block hardness, and user age. Very thin bones and painted parts often need more protection than polished stones.
Ask for an uncolored sample before approving detailed textures. Cracks, bubbles, seams, and shrinkage are easier to see on a plain block.
If one mold has four or six cavities, inspect a sample from every cavity. Different cavities may produce different dimensions, surfaces, or object positions.
For custom tooling, the contract should state:
- Who owns the mold
- Where it is stored
- Who pays for maintenance
- Whether it can be used for other customers
- What happens when the buyer changes suppliers
Place the Hidden Objects
Object placement controls the discovery experience and the chance of damage.
If every object is placed in one group, the user may uncover the full set at once. If an object is too close to the surface, it may be visible before digging starts. If a thin part is placed too deep, it may break during removal.
Create a placement drawing that shows:
- Block dimensions
- Object dimensions and direction
- Minimum distance from the surface
- Minimum space between objects
- Areas where objects may be placed
- Areas that must remain empty
- The top and bottom of the block
For manual production, a simple positioning fixture can hold objects in a fixed place while the block is filled.
For skeleton kits, place large and strong parts deeper. Keep thin tails, legs, horns, and joints away from the hardest areas. For gemstone kits, check whether heavy stones sink before the mixture sets.
During the first production run, open or cut 10–20 blocks from different molds, times, or work shifts. This is an early production check, not a replacement for the final sampling plan.
Specify the Hidden Objects
The hidden item is the main reward. Its size, finish, quantity, and description should match the packaging.
| Hidden Item | Example Quantity | Example Size | Main Check |
|---|---|---|---|
| Gemstones | 6–12 pieces | 12–25 mm along the longest side | Size, treatment, chips, dirt, and assortment |
| Skeleton parts | 8–20 pieces | Based on the finished model | Complete set, fit, strength, and balance |
| Fossils or replicas | 1–6 pieces | Set by the approved sample | Correct name, condition, material, and claim |
| Collectibles | 1–5 pieces | Based on age grading | Design mix, markings, and stated rarity |
These dimensions are commercial examples, not safety limits.
“Mixed gemstones” is not a complete purchase specification. A clearer rule is:
Each kit contains eight stones. Every stone must measure at least 12 mm along its longest side. No more than two stones may be the same named type. Broken fragments and stones with visible dye transfer are rejected.
Final object size must be reviewed against the target age and applicable small-parts rules. In the United States, toys intended for children under three must not contain or release prohibited small parts after the required testing.[2]
State whether stones are:
- Natural or synthetic
- Raw or polished
- Dyed or untreated
- Heat-treated
- Imitation material
A treated or imitation item should not be sold as a rare untreated mineral.
For random collectibles, write the planned ratio for each design. For example, a 10,000-unit production run might contain 4,000 common design A, 3,000 common design B, 2,000 uncommon design C, and 1,000 rare design D. The box should not promise a rarity ratio that the production records cannot prove.
Test Assembly and Tools
A complete set of dinosaur or fossil parts is not enough. The parts must fit together without cutting, glue, adult tools, or excessive force unless the packaging clearly states otherwise.
Check:
- Joint size and depth
- Left and right part matching
- Warping
- Loose or overly tight joints
- White stress marks
- Standing balance
- Final model size
- Assembly order
Common skeleton kits may contain about 8–20 parts. The exact number should be stated in the BOM, instructions, packing record, and quality checklist.
Assemble parts from different mold cavities and production batches. Parts from one carefully prepared sample may fit, while later parts may shrink or warp.
The tools must complete the full activity. A basic one-person set normally includes:
- One chisel
- One brush
- Optional hammer or scraper
- Optional water dropper
Check wooden chisels for weak grain, cracks, rough surfaces, and splinters. Check plastic tools for sharp mold seams, weak tips, thin walls, and burrs.
ASTM F963 and related US rules address accessible edges, points, projections, small objects, and other mechanical hazards. The applicable tests depend on the finished product and intended age.[3]
Use one normal tool set to complete one full block. Do not replace a broken tool during the sample test.
For easy-to-lose connectors or skeleton parts, buyers may prepare spare parts equal to about 0.5%–1% of the order quantity. This is a customer-service allowance, not a fixed industry requirement.
Control Dust and Cleanup
Dig kits create debris. Product design should control the mess and explain it honestly.
Useful additions include:
- A shallow digging tray
- A work mat
- A sealed inner bag
- A water dropper
- A dense brush
- A waste bag
- A formula that forms small chips instead of only fine powder
Do not tell users to soak the block unless the final product has been tested that way. Too much water may create paste, stain hidden objects, damage printed materials, or make cleanup harder.
If water is recommended, give a clear amount. For example, instructions may tell the user to apply 5–10 drops to one small area, wait 20–30 seconds, and then continue scraping.
Test cleanup on:
- Plastic tables
- Sealed wood
- Tile and grout
- Fabric
- Carpet
Colored powder that wipes easily from a tray may remain in grout or textured surfaces.
Check whether wet debris can go into a sink. Disposal instructions must match the actual formula.
Write Clear Instructions
The user should be able to complete the kit without guessing.
- Place the block in the tray or on a protected surface.
- Scrape a thin layer from the top.
- Brush away loose material.
- Add a few drops of water only when needed.
- Stop using force when part of an object appears.
- Work slowly around the object.
- Clean and dry the objects.
- Identify or assemble the discoveries.
The instructions should also explain:
- Adult supervision
- Safe tool use
- Recommended work area
- Cleanup and disposal
- Object cleaning
- Assembly steps
- Specimen names and basic facts
Use short sentences and one action per step. Replace “carefully excavate with the appropriate tools” with clear actions such as “scrape a thin layer, brush away the powder, and slow down when you see an object.”
Educational content must match the actual contents. Do not print information about 12 minerals if the factory is packing an uncontrolled mix of six stones.
For custom boxes, inserts, warnings, identification cards, barcodes, and QR-code instructions, see K&M’s guide to private-label excavation toy packaging.
Check US Safety Rules
Children’s toys manufactured on or after April 20, 2024 must meet ASTM F963-23 as incorporated under 16 CFR Part 1250. Not every section applies to every toy, so the test plan must be based on the final materials, structure, age grade, and use.[4]
Products designed mainly for children aged 12 or younger may require third-party testing by a CPSC-accepted laboratory. The responsible US manufacturer or importer issues the Children’s Product Certificate based on the applicable test results and rules.[5]
Children’s products must also carry permanent tracking information on the product and packaging when practical. The information should identify:
- The manufacturer or private labeler
- The production location
- The production date
- The batch or production run
These tracking requirements help connect a finished product to its production records.[6]
Changing a pigment, tool, coating, hidden object, supplier, or age grade may affect the test plan. Do not assume that an old report for a similar kit covers a new product.
Check EU and UK Rules
The EU Toy Safety Regulation, Regulation (EU) 2025/2509, entered into force on January 1, 2026 and will apply from August 1, 2030 after the transition period. Directive 2009/48/EC remains applicable until July 31, 2030.[7]
EU market work may include:
- A safety assessment
- Applicable EN standards
- Technical documents
- A Declaration of Conformity
- Traceability information
- Warnings and instructions
- CE marking
CE marking is not simply a laboratory certificate. The manufacturer must complete the applicable conformity work and take responsibility for the product.
Great Britain and Northern Ireland do not use exactly the same marking route. Toys placed on the Great Britain market may use CE or UKCA marking when the stated conditions are met.[8]
In Northern Ireland, CE marking remains required. CE and UKNI may be needed when a UK conformity-assessment body is used. A product carrying both CE and UKNI cannot be placed on the European Economic Area market.[9]
For more information on ASTM F963, EN 71, CE marking, CPCs, and supporting documents, review K&M’s US and EU toy safety guide.
Check Other Markets
Canada, Australia, Japan, and other markets have separate rules. Reports and labels prepared for the United States or European Union do not automatically cover another country.
In Canada, children’s toys manufactured, imported, advertised, or sold are subject to the Canada Consumer Product Safety Act and the Toys Regulations. The requirements depend on the materials, construction, features, and hazards of the finished product.[10]
Give the laboratory:
- The final bill of materials
- Final product samples
- Packaging artwork
- Intended age
- Destination countries
- Instructions and warnings
Ask for a product-specific test plan before mass production.
Build the BOM
The bill of materials, or BOM, is the controlled list of everything used in the kit.
- Block base material
- Fillers and pigments
- Surface coatings
- Hidden objects
- Paints and printing inks
- Tools
- Inner bag
- Tray or insert
- Instructions and identification cards
- Stickers and labels
- Retail box
- Adhesives
- Master carton
Each BOM line should show:
- Supplier
- Material
- Part number
- Dimensions
- Color
- Quantity
- Approved version
Use revision numbers and approval dates. A file named “final BOM” is not enough because several different files may later use the same name.
The purchase order should state that the factory cannot change a material, supplier, tool, or package without written approval. The BOM must match the physical approval sample.
Test the Packaging
A good block can still reach the customer cracked if it moves inside the package.
A fitted paper tray, molded pulp tray, cardboard insert, plastic tray, or wrapped block can stop movement. The right choice depends on block weight, sales channel, shipping route, cost, and sustainability goals.
Check:
- Block corners touching the retail box
- Tools pressing against the block
- Empty space around the block
- Loose parts hitting painted objects
- Inner-bag strength and seal
- Retail box strength
- Master-carton strength
- Final carton weight
For manual handling, an internal target of about 8–15 kg per master carton is often easier to manage than a very heavy carton. The correct limit depends on product density, customer requirements, warehouse equipment, and shipping method.
ASTM D5276 covers free-fall drop testing of loaded containers, boxes, bags, and sacks.[11]
ASTM D4169 provides test sequences for shipping units based on common distribution hazards. The chosen distribution cycle and test level should match the real shipping route.[12]
After testing, open the package and check:
- Block cracks
- Loose powder
- Broken tools
- Scratched objects
- Crushed boxes
- Shifted parts
- Opened inner seals
Test retail and e-commerce shipping separately. A palletized retail carton may face less individual handling than a single kit sent through parcel delivery.
Control Production
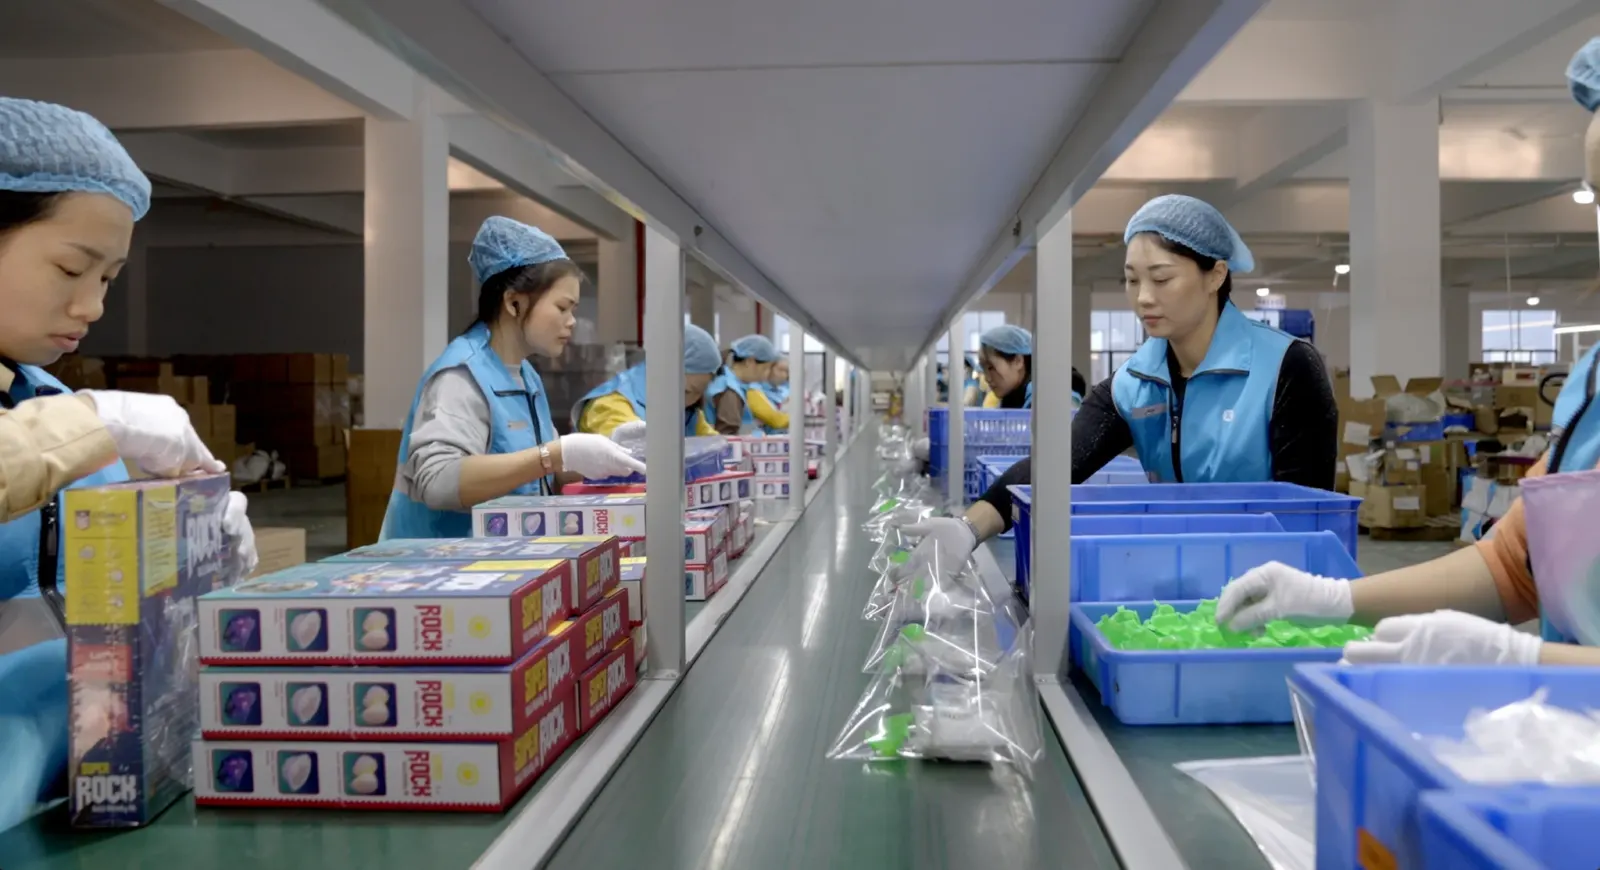
A normal production process may include:
- Check incoming materials.
- Weigh and mix the block material.
- Fill the first part of the mold.
- Place the hidden objects.
- Complete the fill.
- Dry or cure the block.
- Remove and inspect the block.
- Check weight and drying condition.
- Prepare tools and printed parts.
- Seal the block.
- Pack the retail box.
- Inspect the finished kit.
- Pack the master carton.
Control each problem at the stage where it happens. Hidden objects must be counted before they go into the block because the final packing worker cannot see them.
Use pre-counted sets for skeleton pieces, stones, or collectibles. For random designs, keep a batch record showing how many units of each design were used.
Set a maximum time between mixing and mold filling. Material that starts to set before filling may produce weak surfaces, poor detail, or uneven hardness.
Do not seal blocks while they are still warm or damp. Trapped moisture can change hardness, damage paper parts, create odor, or affect hidden objects.
Set Quality Limits
The approved sample shows the target appearance. Written quality limits show how much variation is allowed.
| Check | Example Requirement |
|---|---|
| Block weight | Approved target with a tested tolerance |
| Dimensions | Maximum difference stated in millimeters |
| Cracks | No structural crack; cosmetic limits shown by photographs |
| Hidden pieces | Exact promised quantity |
| Object position | No object visible before digging starts |
| Tools | Correct quantity with no crack, burr, break, or splinter |
| Printing | Correct version, readable text, and approved color range |
| Barcode | Correct number and scannable |
| Inner seal | Fully closed with no powder leakage |
| Assembly | All parts fit and the model stands as intended |
Do not copy weight or size tolerances from another dig kit. Set limits using the approved sample and stable production data.
Define critical, major, and minor defects before inspection. Use photos for cracks, chips, color differences, stains, and package damage.
Inspect the Order
Development testing, first-production checks, and final inspection have different purposes.
| Stage | Example Starting Point | Purpose |
|---|---|---|
| Prototype screening | At least 5 blocks per version | Compare dig time, dust, hardness, and tool performance |
| First production check | 10–20 blocks from different molds, times, or shifts | Confirm that production matches the approved sample |
| Packaging trial | Several full retail packs and master cartons | Check movement, cracks, leakage, and box damage |
| Approval samples | At least 4 complete kits | Use for digging, packaging, testing, and retention |
These quantities are practical starting points. Final inspection quantities should follow the agreed purchase contract and sampling plan.
Before shipment, inspect packed goods using an agreed lot-sampling method. ISO 2859-1:2026 provides acceptance-sampling plans for inspection by attributes, but the buyer must still choose the inspection level, defect groups, and acceptance limits.[13]
The final inspection should include destructive checks. Selected blocks must be excavated or cut open because an outside box inspection cannot confirm hidden-object count or internal condition.
Also check:
- Quantity per carton
- Design mix
- Carton markings
- Barcodes and language versions
- Retail box condition
- Inner seals
- Tool counts
- Assembly performance
- Batch information
The order contract should state what happens if inspection fails, including sorting, rework, replacement, reinspection, delays, and extra costs.
Compare Cost and MOQ
Ask the manufacturer to separate repeat unit costs from one-time development charges.
- Block and hidden objects
- Tools
- Instructions and printed cards
- Retail packaging
- Master cartons
- Assembly
- Custom molds
- Design and artwork
- Samples
- Laboratory testing
- Inspection
- Export packing and freight
Check whether the quotation is EXW, FOB, CIF, or DDP because these terms include different costs and responsibilities.
Useful quotation quantities may include:
- 1,000 units for a small trial
- 3,000 units for a standard first order
- 5,000 units for a larger private-label run
- 10,000 units for a volume-price comparison
These quantities are RFQ examples. They do not mean every factory will accept a 1,000-unit order.
MOQ may be controlled by the printed box, molded object, tray, pigment, manual, or bag rather than the block itself. Ask for the MOQ of each custom item.
Ways to reduce the first order include:
- Use an existing block mold
- Use standard tools
- Use existing hidden objects
- Customize only the box and instructions
- Use a sleeve around a standard box
- Use labels for a trial order
- Use one box structure for several designs
Confirm whether the MOQ applies to the full order or each design. “3,000 units” may mean 3,000 units for every dinosaur design, not 3,000 units divided among all designs.
For more detail on factory quotations, documents, shipping terms, and supplier comparison, see K&M’s educational toy sourcing guide.
Plan the Lead Time
Lead time should start from a named approval point, not from the first email.
A custom project may include:
- Product brief
- Price and feasibility review
- Mold design
- Prototype
- Sample changes
- Artwork
- Safety review
- Laboratory testing
- Preproduction sample
- Material ordering
- Mass production
- Inspection
- Shipping
For budgeting, allow for two or three sample rounds on a new custom product. A simple private-label order may need fewer revisions, while a new block shape, skeleton mold, or package structure may need more.
Separate sample time, production time, and shipping time. “Delivery in 45 days” may mean the factory finishes production in 45 days, not that the goods reach the buyer’s warehouse.
Add time for:
- Sample failure
- Artwork corrections
- Retesting
- Reinspection
- Public holidays
- Peak-season production
K&M’s private-label packaging guide gives an example total project range of about 35–55 working days for a new branded excavation kit, depending on tooling, printing, drying, assembly, and approval time. This should be treated as a project example rather than a guaranteed industry lead time. See private-label excavation toy lead-time planning.
Audit the Factory
Find out which processes are completed by the main supplier and which are subcontracted:
- Block mixing
- Block molding
- Drying
- Plastic molding
- Painting
- Printing
- Assembly
- Packing
- Laboratory coordination
Subcontracting is not automatically a problem, but the main supplier must still control drawings, materials, records, inspection, and corrective action.
During an audit, check:
- Raw material labels and storage
- Mixing and drying records
- Mold condition
- Object-counting methods
- Work instructions
- Retained samples
- Rejected-product storage
- Calibration records
- Batch traceability
- Packing lines
- Finished-product storage
Review completed production records, not only blank forms. Ask workers how they identify the correct formula, object set, instruction version, and tool pack.
Use K&M’s guide to choosing a STEM toy OEM factory as a supplier-screening reference.
Send a Clear RFQ
Send the same request for quotation to every shortlisted supplier.
Product: Custom dinosaur excavation kit
Market: United States
Target age: 8+ subject to final assessment
Block: One fossil-shaped block weighing about 300–400 g
Activity time: Development target of 30–45 minutes
Contents: Twelve skeleton parts forming one complete model
Tools: One wooden chisel and one brush
Packaging: Printed retail box with fitted inner tray
Instructions: English digging and assembly guide
Quantity: Prices for 1,000, 3,000, 5,000, and 10,000 units
Customization: Box, manual, block logo, and skeleton color
Testing: Quote separately after product review
Inspection: Final inspection with destructive block checks
Delivery: State sample, production, and shipping time separately
Documents: BOM, specifications, packing data, and relevant test records
Also request:
- Product and carton dimensions
- Net and gross weight
- Units per carton
- Mold and sample fees
- Payment terms
- Quotation validity
- Mold and artwork ownership
- Replacement-part cost
- Defect-handling terms
Ask the supplier to list every assumption behind the price. A low quote may be based on a smaller block, fewer objects, an existing mold, bulk packing, or no laboratory testing.
Approve the Sample
Keep one marked approval sample with the buyer and one with the factory.
For a new product, prepare at least four complete samples when possible:
| Sample | Use |
|---|---|
| Sample 1 | Dig-time, dust, and tool testing |
| Sample 2 | Assembly and object inspection |
| Sample 3 | Packaging or laboratory testing |
| Sample 4 | Retained approval reference |
The sample should represent:
- Final block material and hardness
- Final size and color
- Final hidden objects
- Final tools
- Final artwork
- Final instructions
- Final inner packaging
- Final retail box
Record anything the sample does not fully represent. For example, a digitally printed sample box may not show the exact production print color.
Do not approve the kit from photographs alone. Dig the block, clean the objects, assemble the model, scan the barcode, and open the package as a first-time customer.
After approval, freeze the design. Every later change should have a written description, a new version number, and a decision on whether new testing is needed.
Final Checklist
- Target user, age, and sales market are defined.
- Dig time has been tested with the supplied tools.
- Block formula, weight, and drying controls are approved.
- Hidden-object quantity, size, and placement are fixed.
- Multipart objects assemble correctly.
- Tools finish the activity without breaking.
- Dust, water use, cleanup, and disposal are explained.
- Instructions match the final product.
- The test plan uses the final age grade and materials.
- The BOM and artwork versions are controlled.
- Packaging has been tested for the real shipping route.
- Quality limits and inspection methods are written.
- Final inspection includes opening or digging selected blocks.
- Mold ownership and material-change rules are documented.
- The quote includes tooling, testing, packing, inspection, and freight preparation.
- The lead-time starting point is written.
- Every finished carton can be traced to a production batch.
Conclusion
A reliable dig kit is built around measurable controls. Set the block weight and target dig time, test at least five samples during development, define every hidden object by quantity and size, and require one tool set to finish one full block. During the first production run, open 10–20 blocks from different molds or shifts. Before shipment, check the barcode, assemble the model, test the packaging, and open selected blocks to confirm the hidden contents. A controlled BOM, approved sample, batch number, and written defect limits help prevent cracked blocks, missing parts, broken tools, customer returns, and repeated testing costs.
Buyers can submit their target age, sales market, product design, quantity, packaging, and delivery needs through K&M’s custom educational toy project page.